ACR-EX GUI
ACR-EX GUI is a graphical user interface for ACR-EX devices. It is a tool that allows you to configure and read out your ACR-EX devices.
Using the GUI
To manage the ACR-EX device, you need a Chromium-based browser (Google Chrome is recommended) and an optical probe.
Connecting to the GUI
- Connect the optical probe to the computer via USB port.
- Open the browser and navigate to ACR-EX GUI.
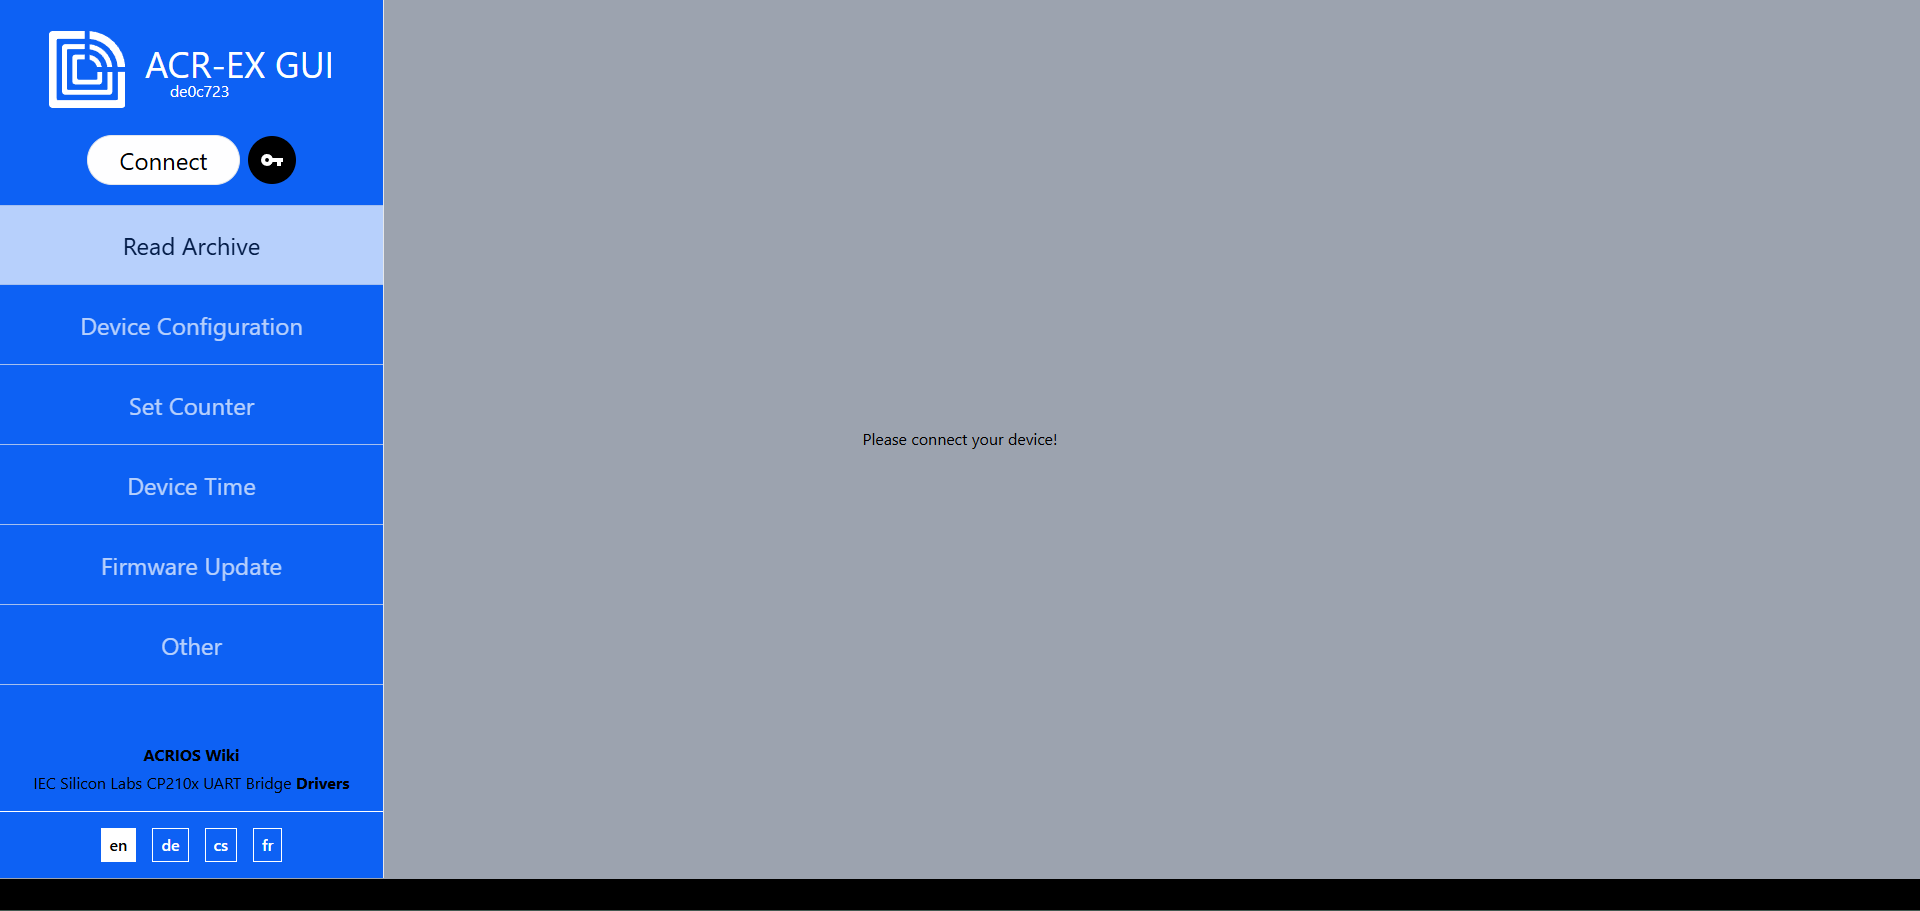
- Put the device in IEC mode and connect the probe to the device.
 warning
Firmware versions 1.1.5 and older have an IEC mode timeout of 30 seconds. If the device doesn't receive any commands in that time, it will switch back to the previous mode. This timeout is reset with every command received.
infoFirmware versions 1.1.6 and newer have an IEC mode timeout of 5 minutes.
- Click on the Connect button. The optical head should be detected (make sure the driver is installed), select it and click on Connect.
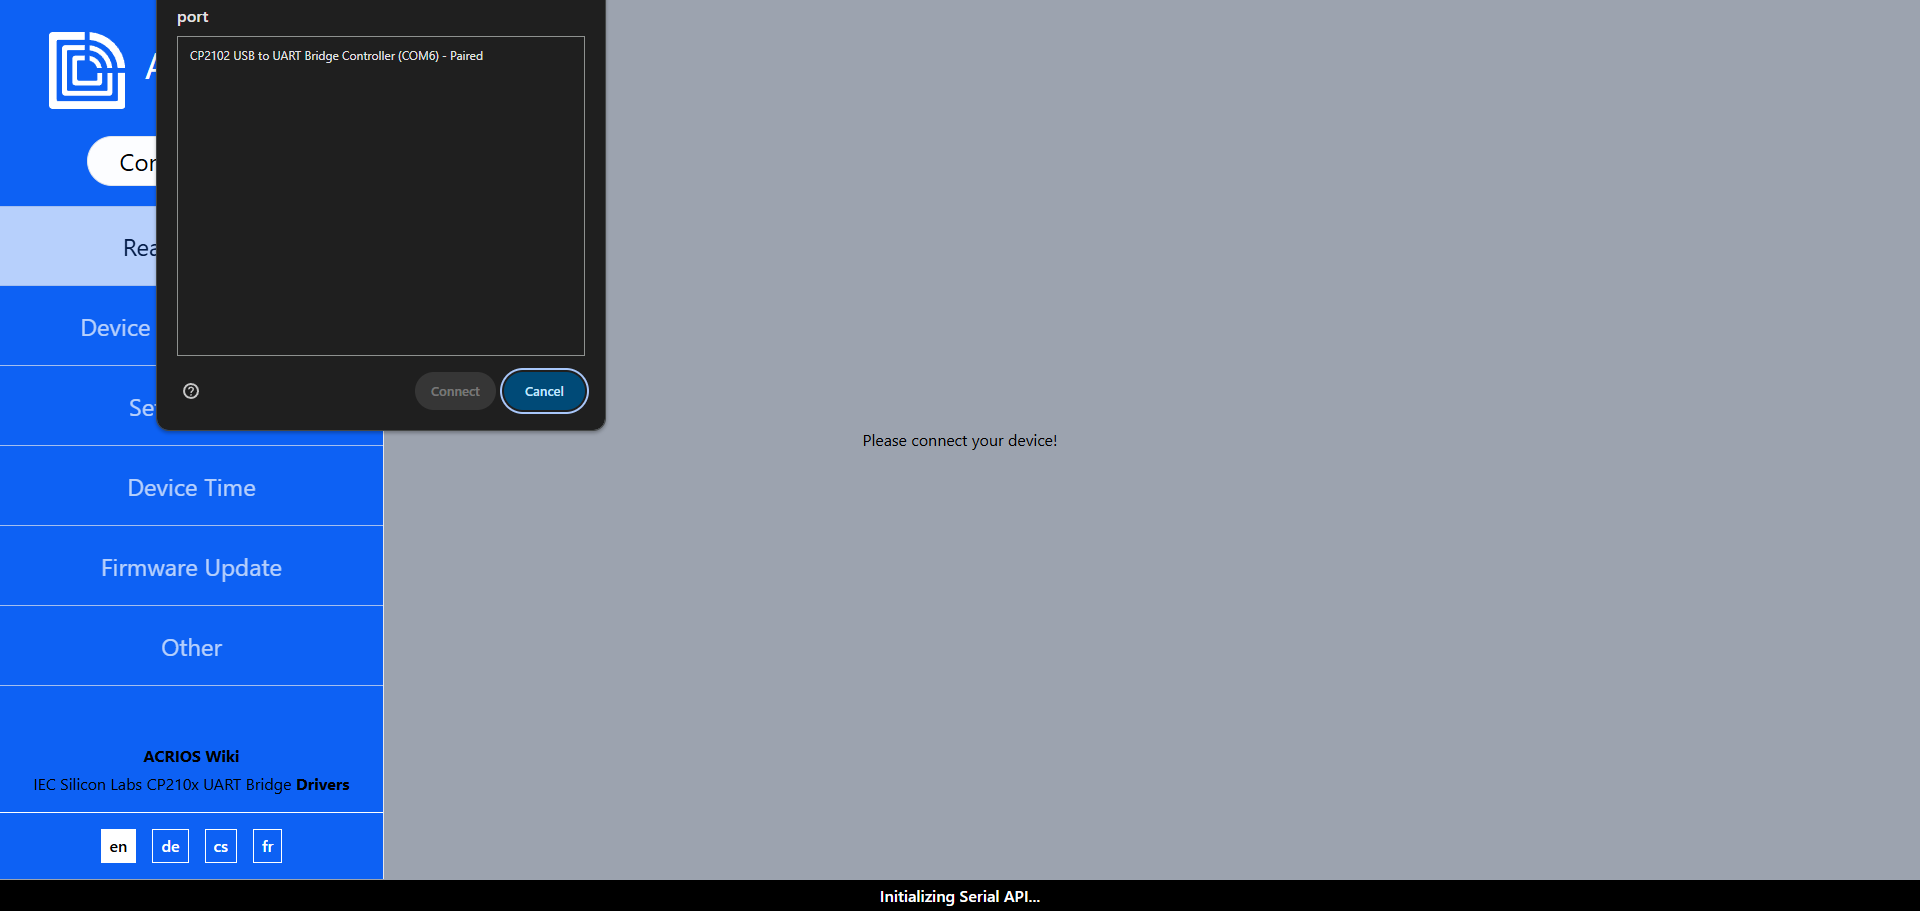
- If the device connected successfully, you should see the following screen and be able to navigate through the tabs.

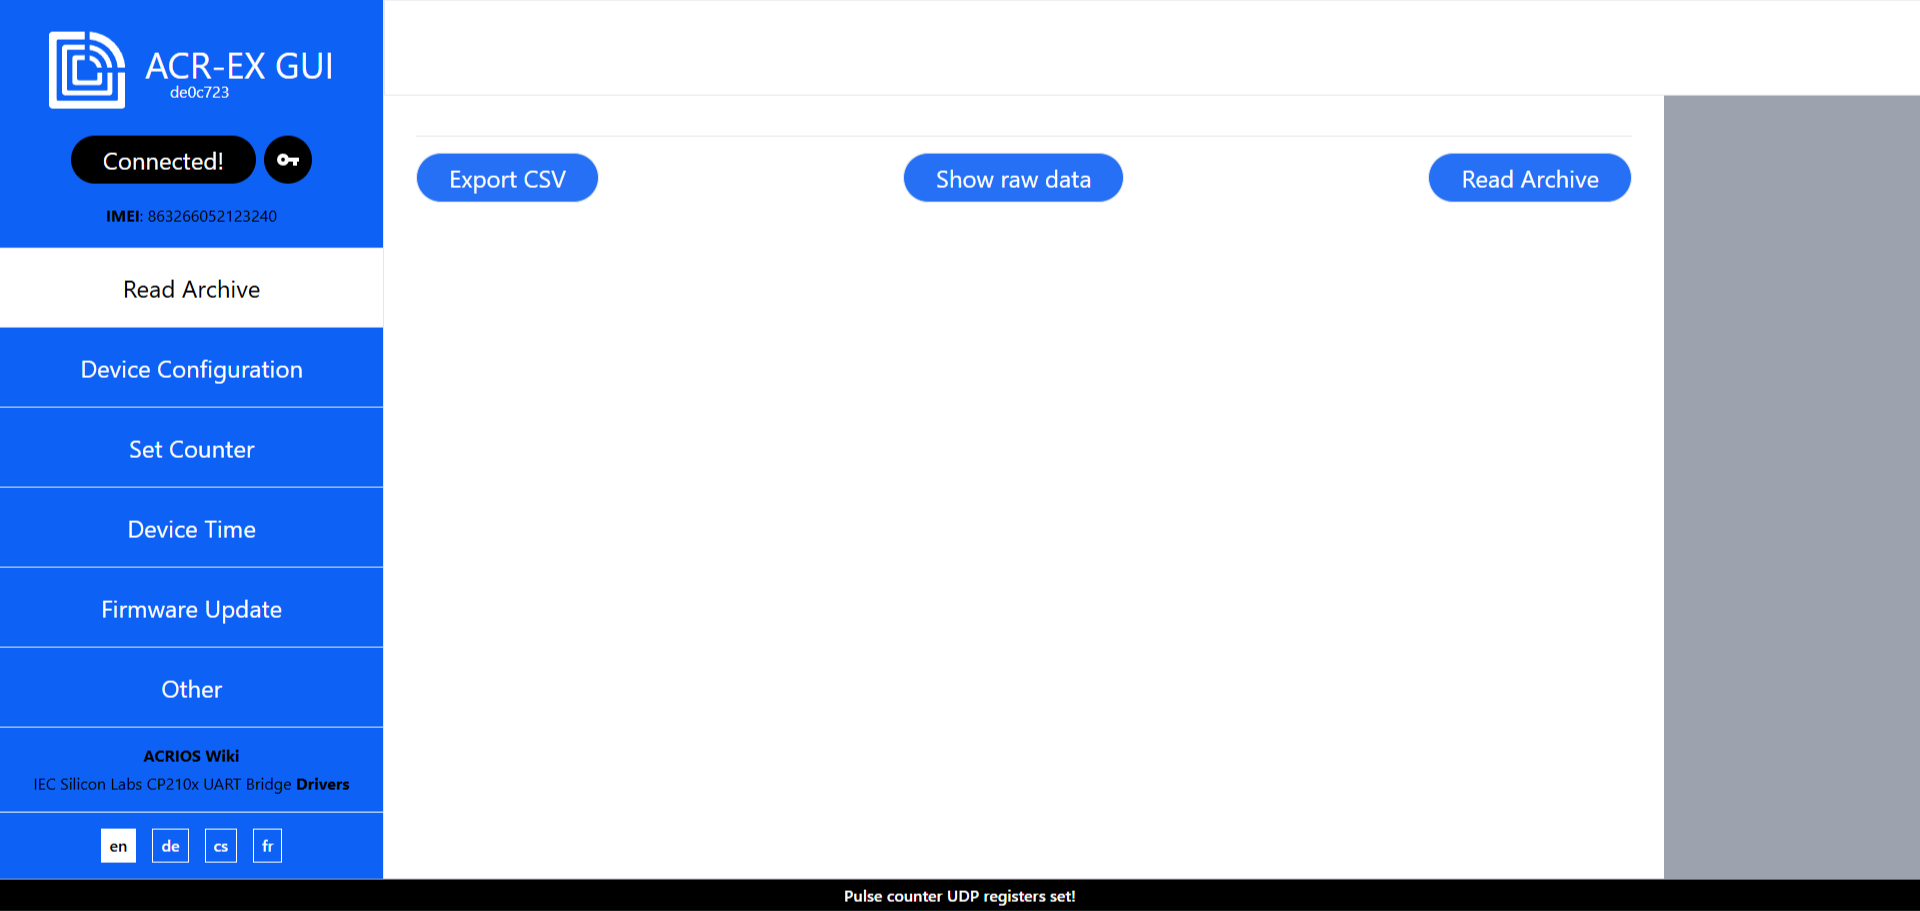
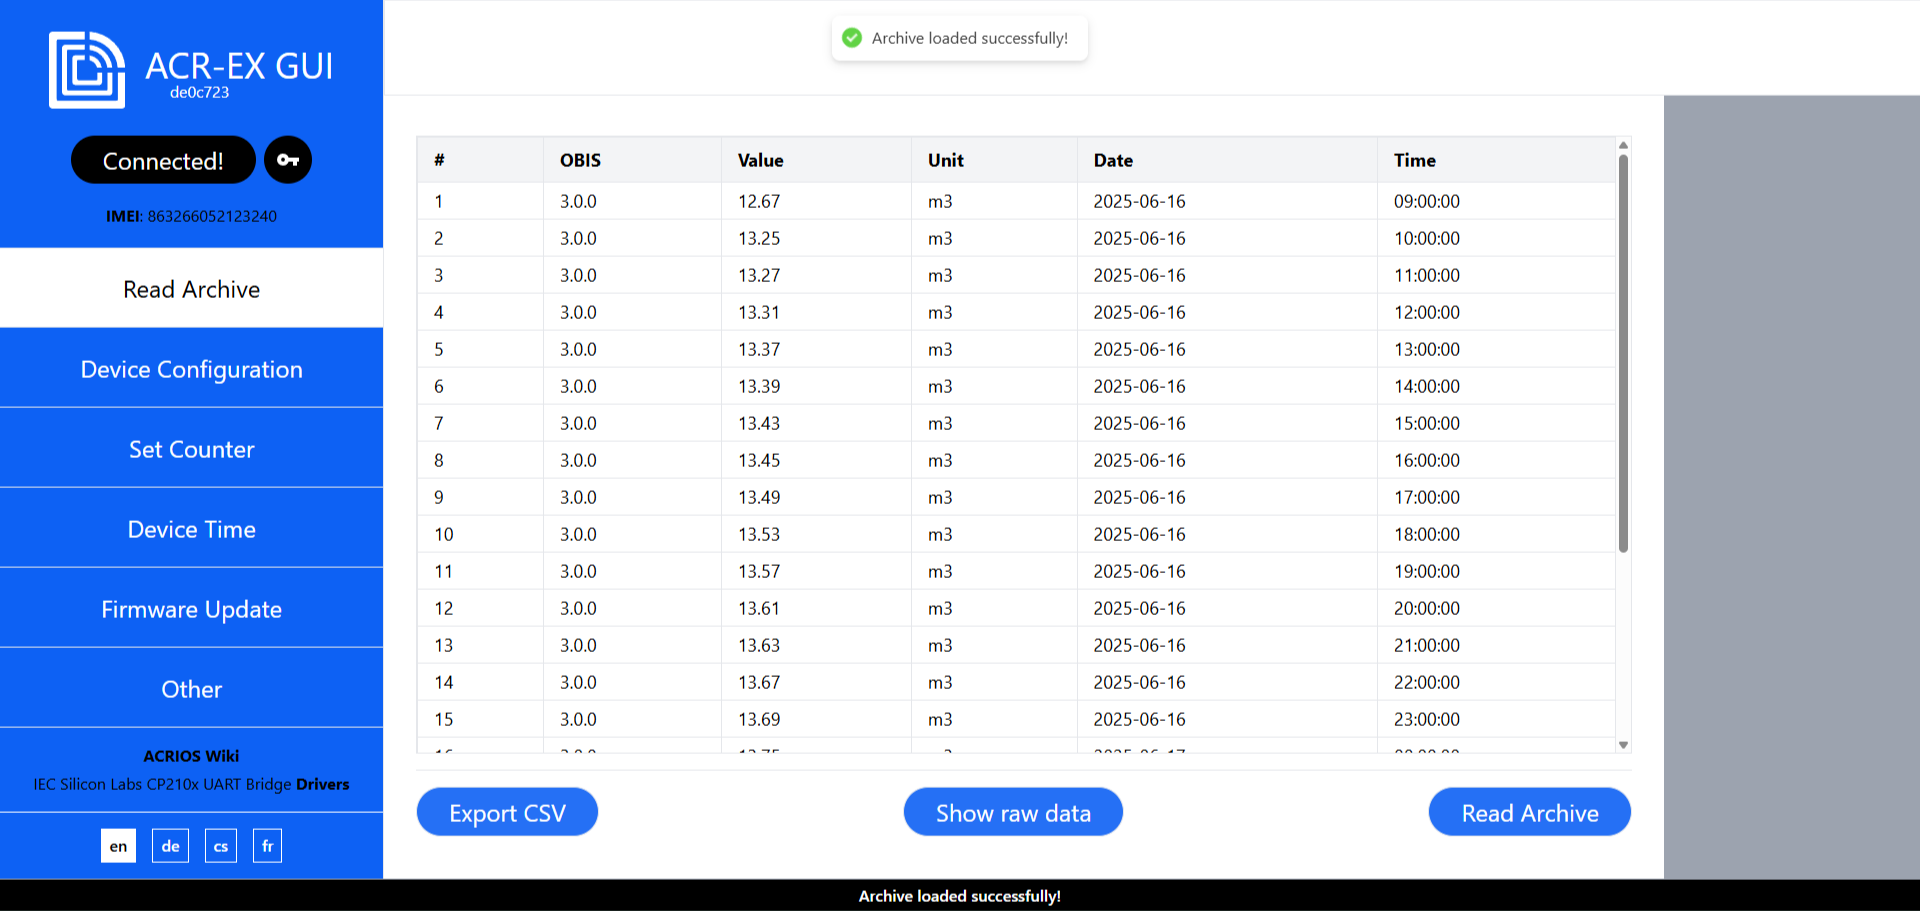
Reading the archive
- Navigate to Read Archive tab and click on the Read Archive button.
- The archive will be read and displayed in the table.
Configuring the device
- Navigate to the Device Configuration tab.
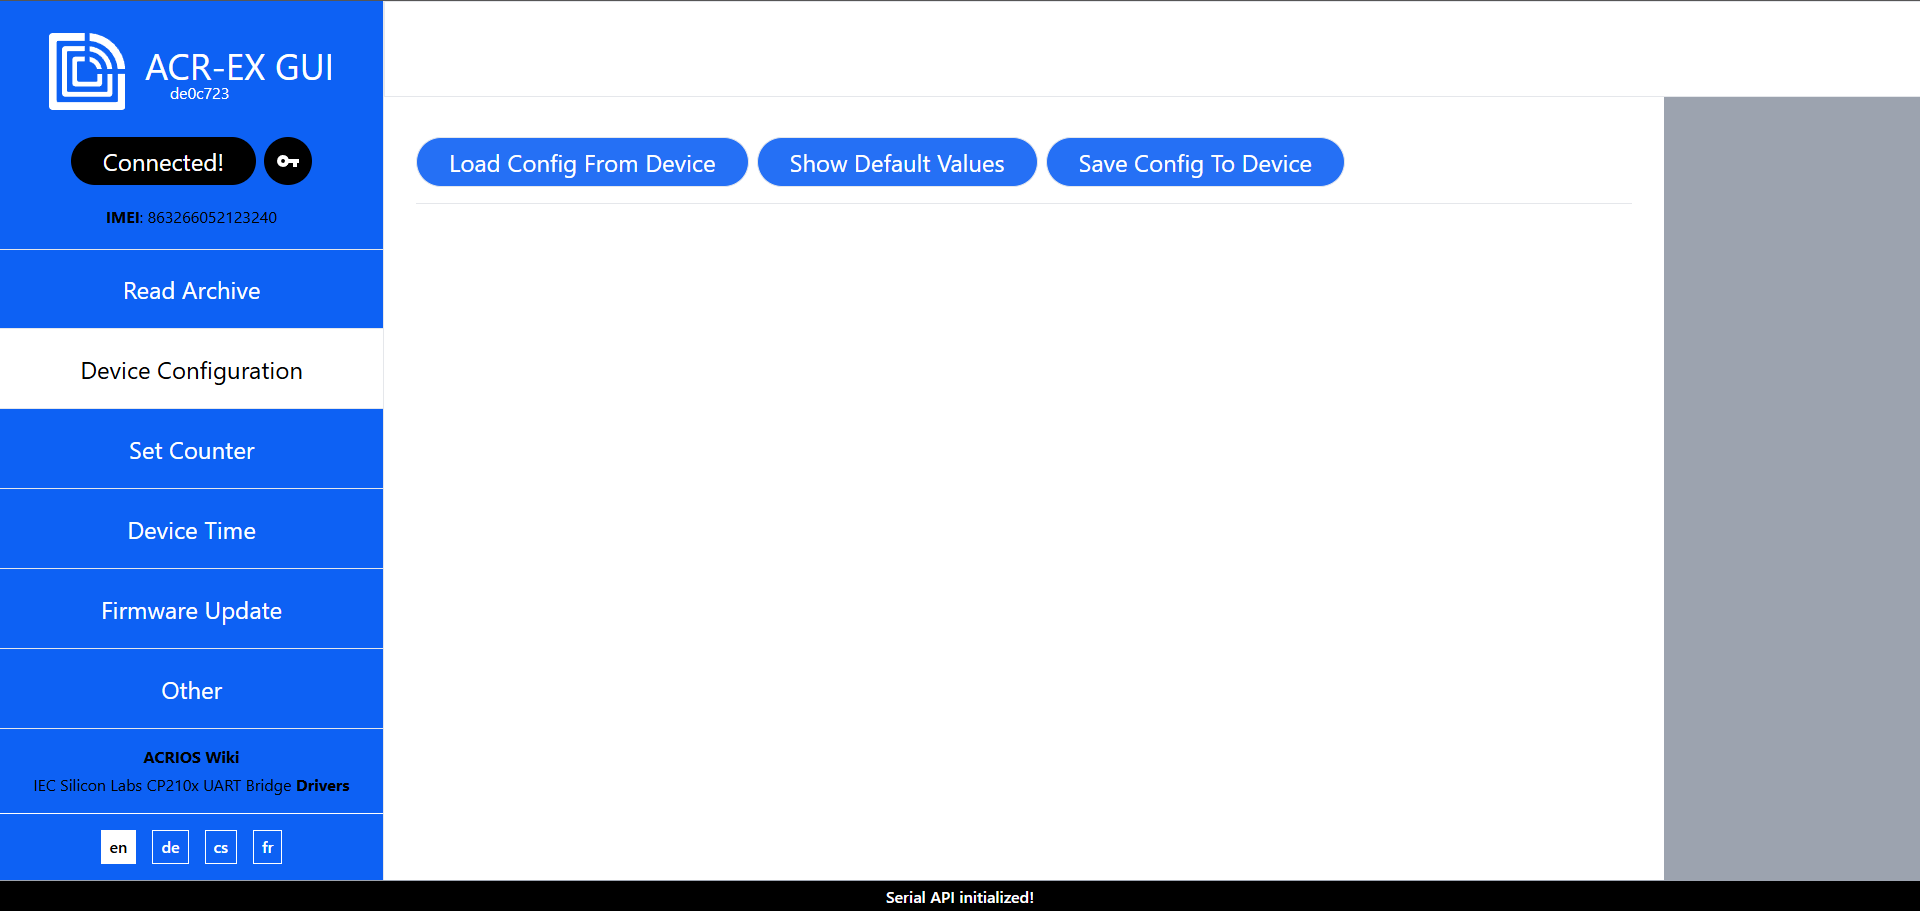
- You can either Load Config From Device or Show Default Values by clicking on the appropriate button.
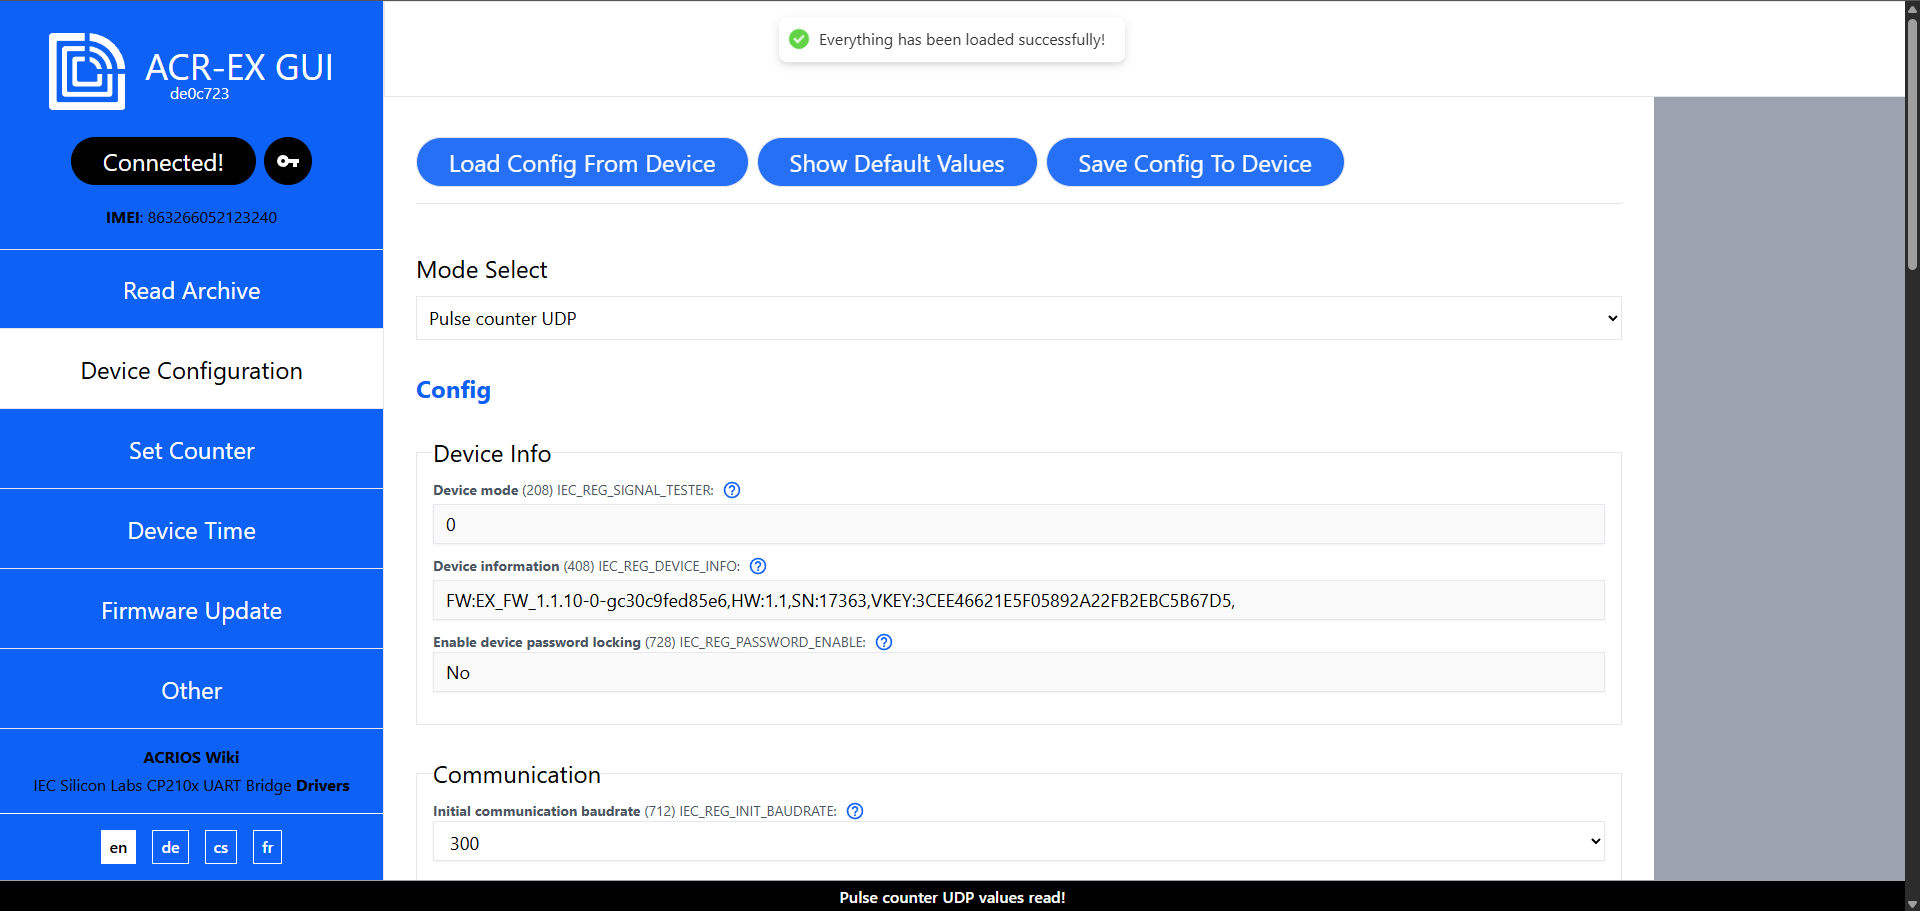
- Configure the device settings according to your needs.
- Click on the Save Config To Device button to save the configuration. After successfully saving the configuration, you should see the following screen.
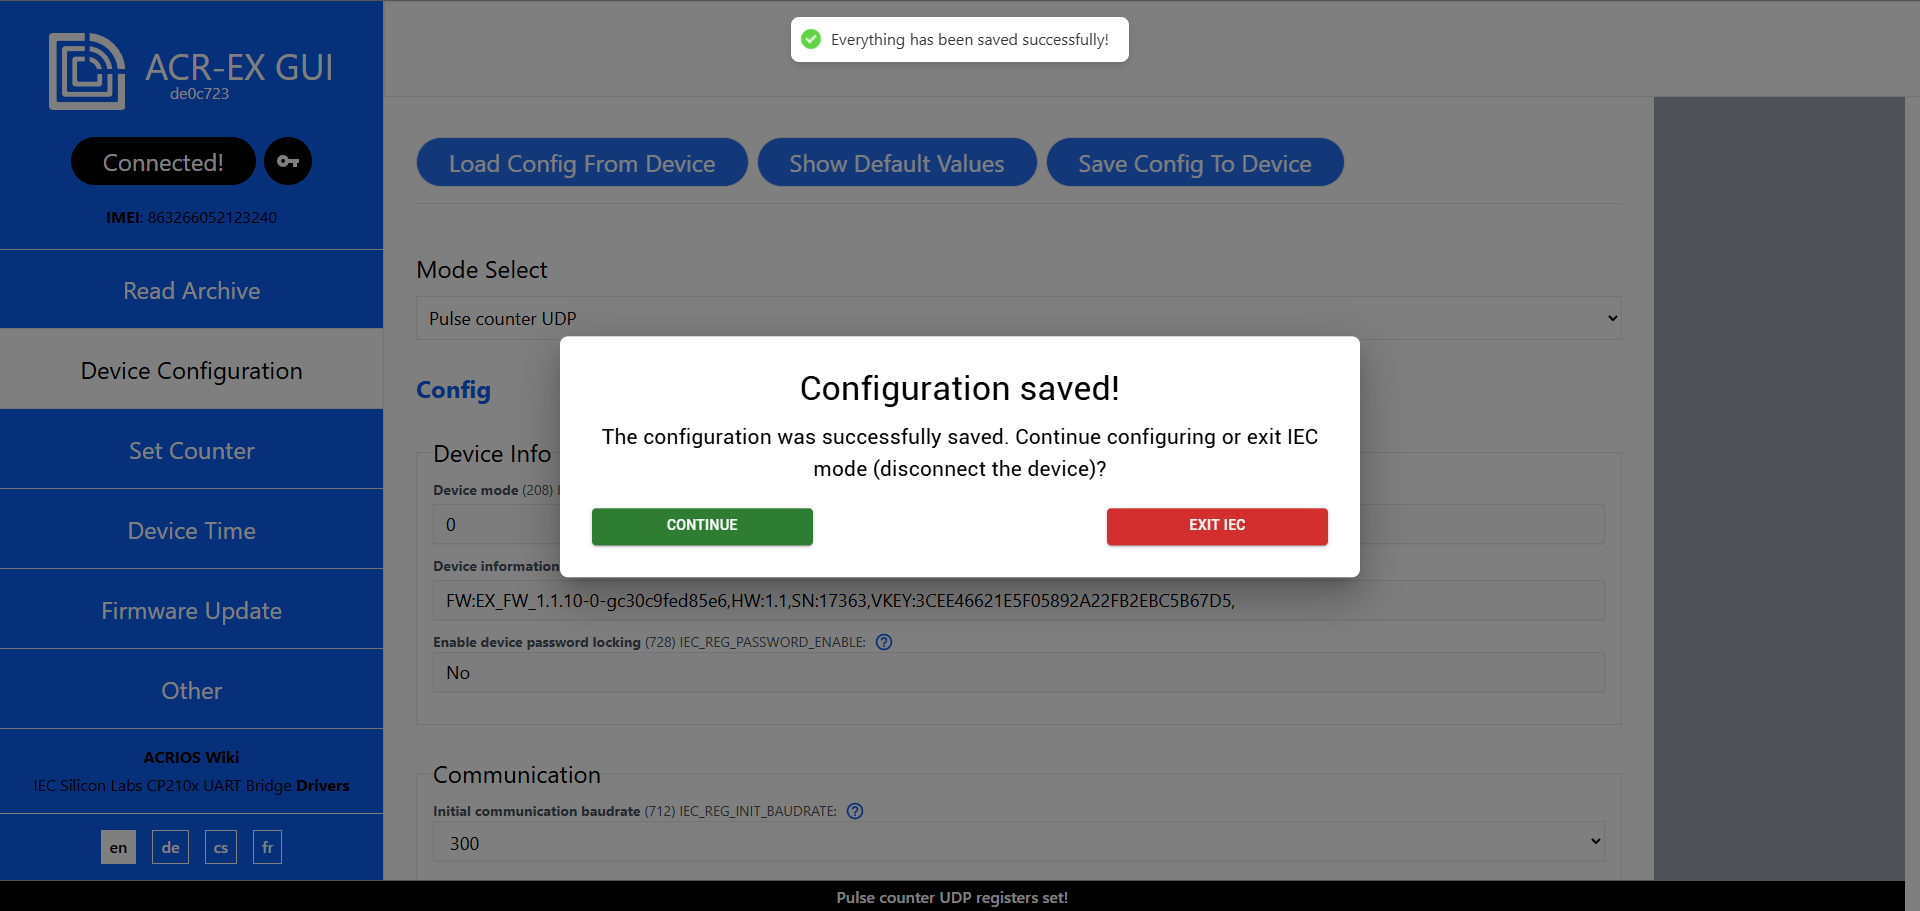 warning
If the device mode is changed (for example from Pulse Counter to Signal Tester), the device will automatically restart to apply the new configuration.
Setting the counter
- Navigate to the Set Counter tab.
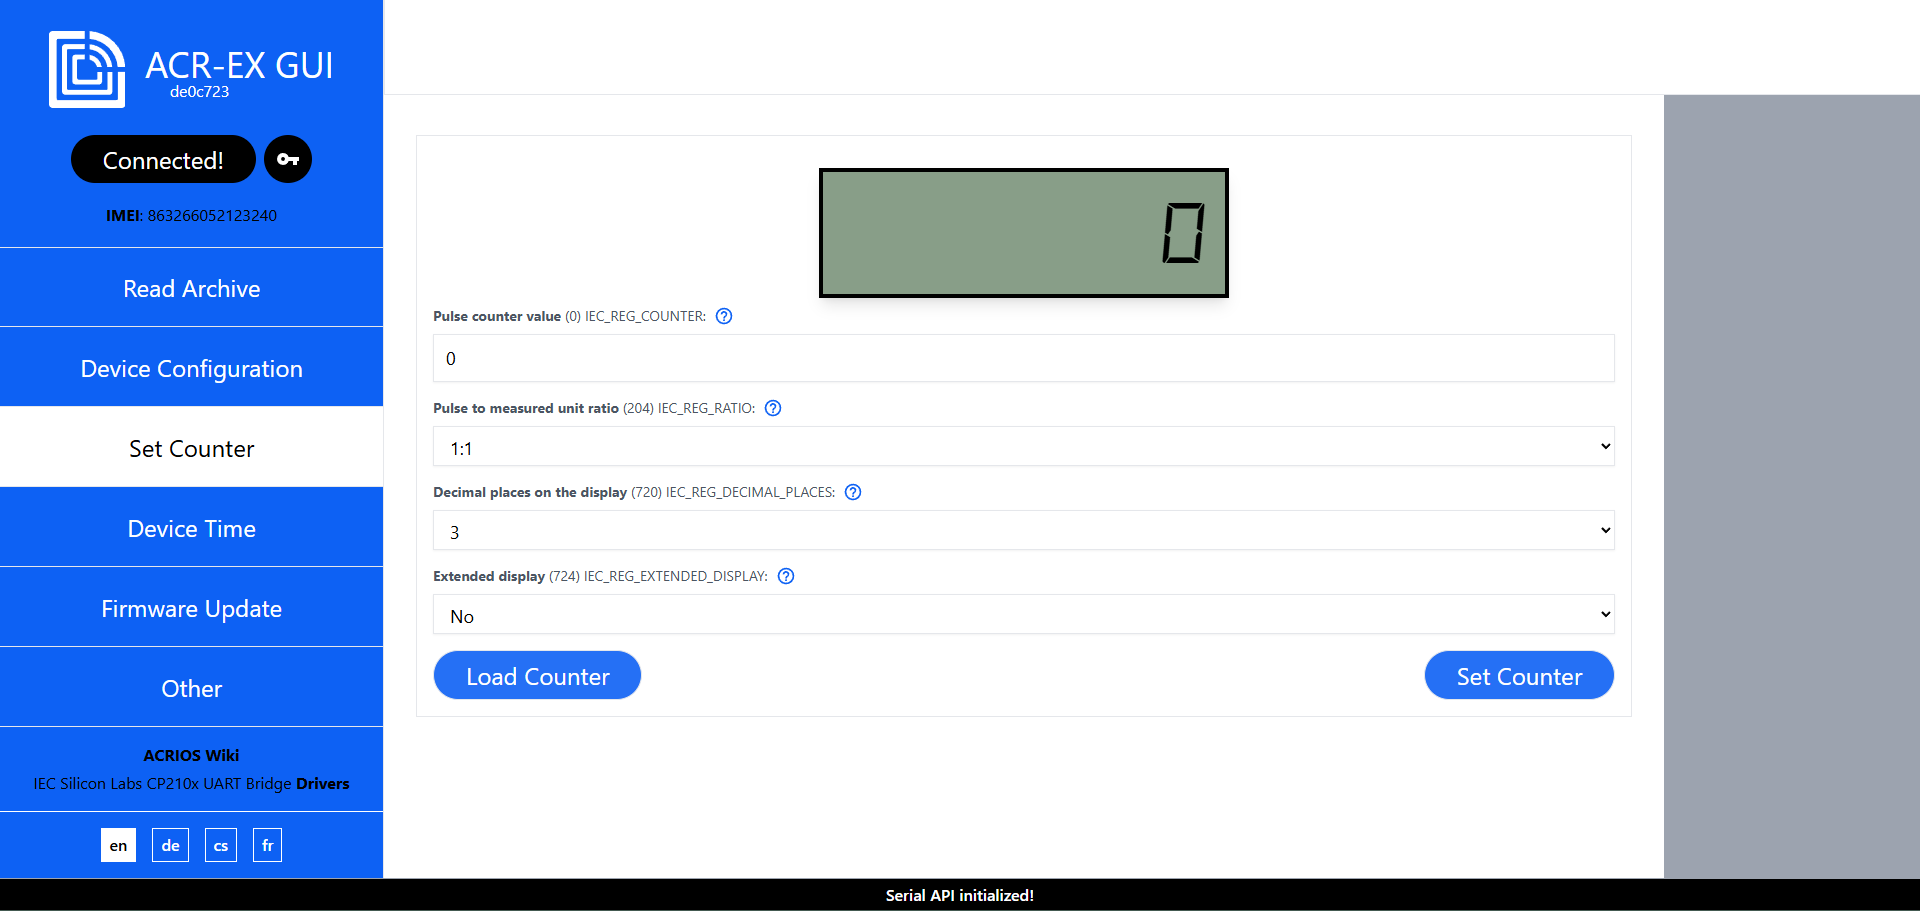
- To load the current counter value, click on the Load Counter button.

- To set the counter value, enter the desired values and click on the Set Counter button.
 interesting
The GUI automatically parses downscaling ratios (e.g.
1:10,1:100), number of decimal places, and extended display mode based on the entered pulse counter value.tipTo set a custom ratio, number of decimal places, or extended display mode, first enter the desired pulse counter value, then adjust the other settings as needed.
Setting the time
The ACR-EX device automatically synchronizes the time on startup and on month change.
- Navigate to the Device Time tab.
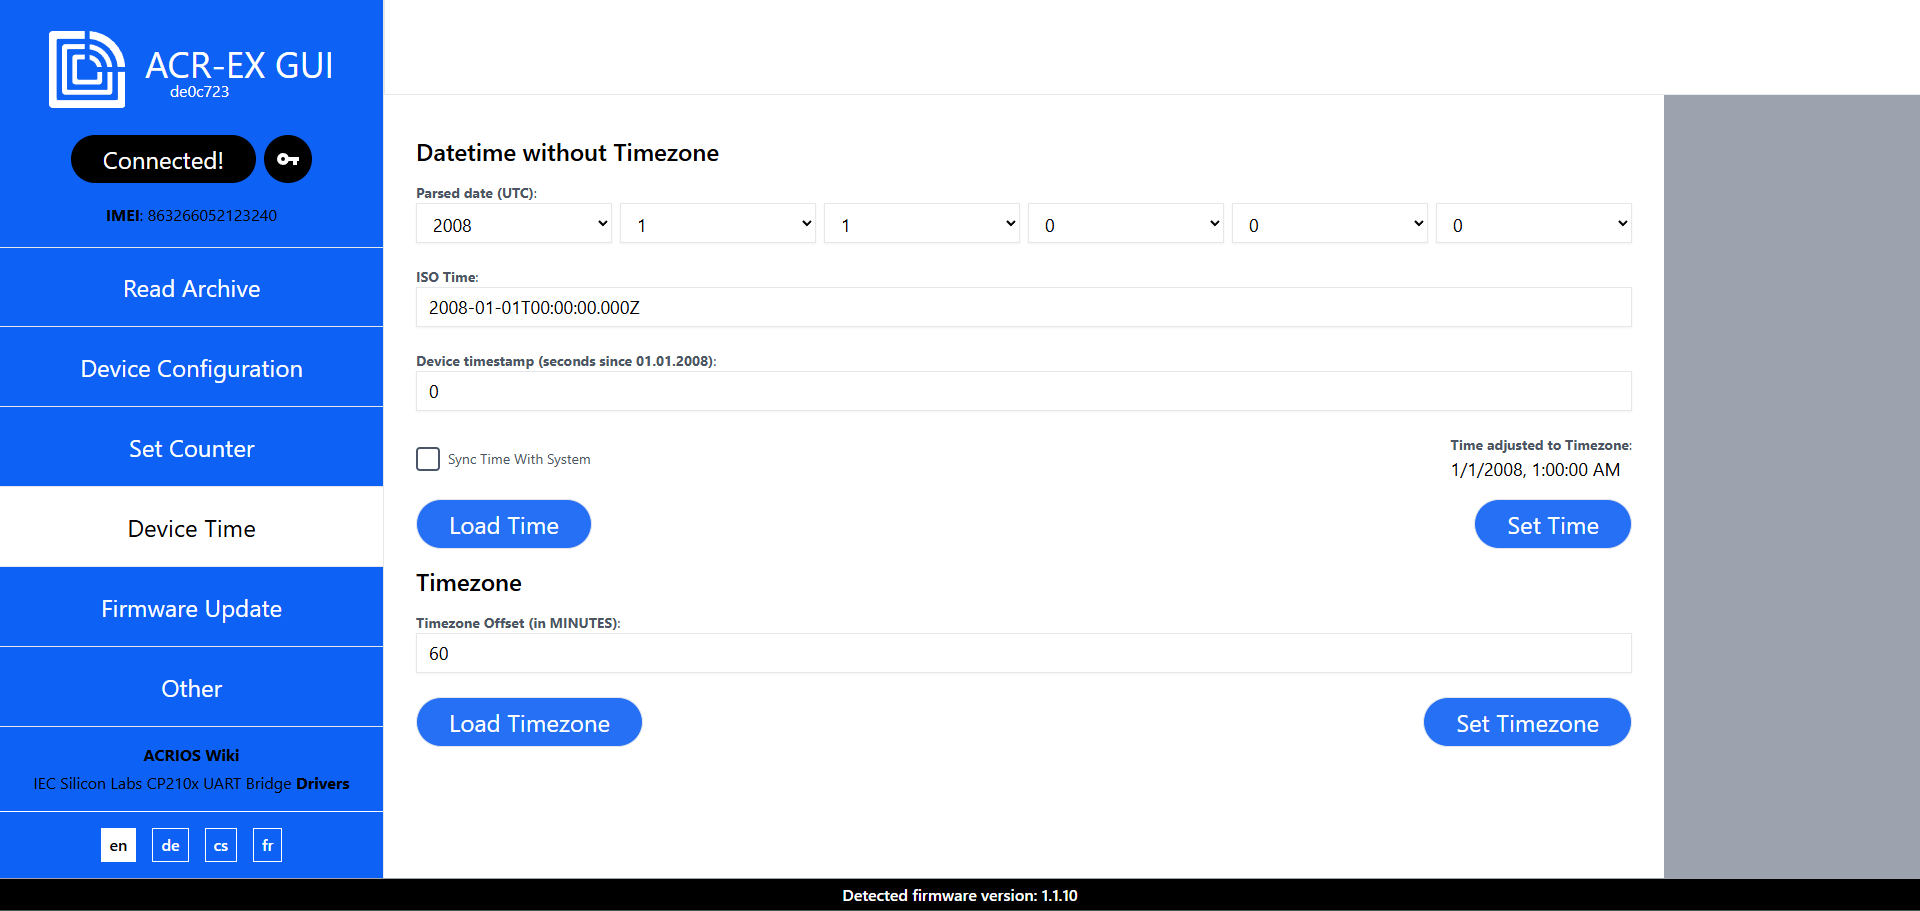
- You can load the current time or the set timezone from the device by clicking on the appropriate Load button.

- To set the time or timezone, enter the desired values and click on the appropriate Set button.
tip
By selecting the Sync Time with System option, the GUI will synchronize the set time and timezone with the system time of the computer.

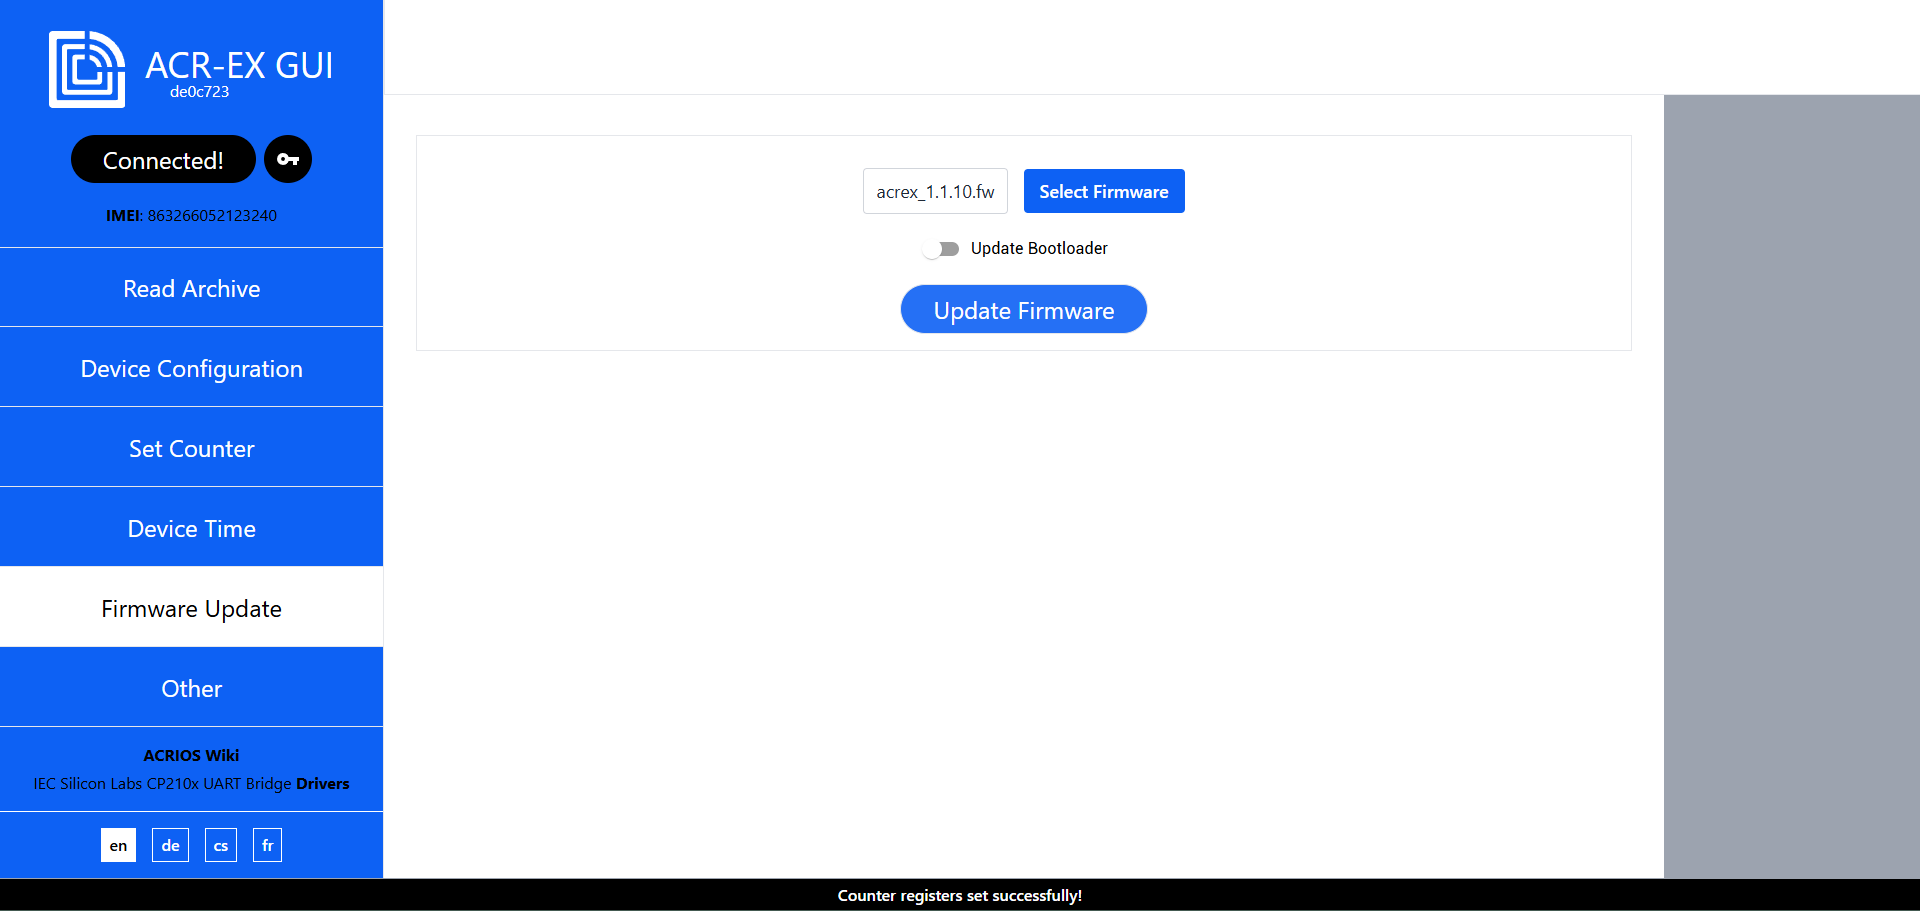
Updating the firmware
- Navigate to the Firmware Update tab.

- Select the firmware file you want to upload by clicking on the Select Firmware button.
 info
infoFirmware files are named
acrex_X.X.X.fw, whereX.X.Xis the version number. The.fwis a custom extension used by ACRIOS Systems for firmware update files (NB-IoT devices). It is a binary file that contains the firmware for the ACR-EX device. - After selecting the firmware file, you can either click on the Update Firmware button to start the update process or also update the bootloader by selecting the Update Bootloader option.
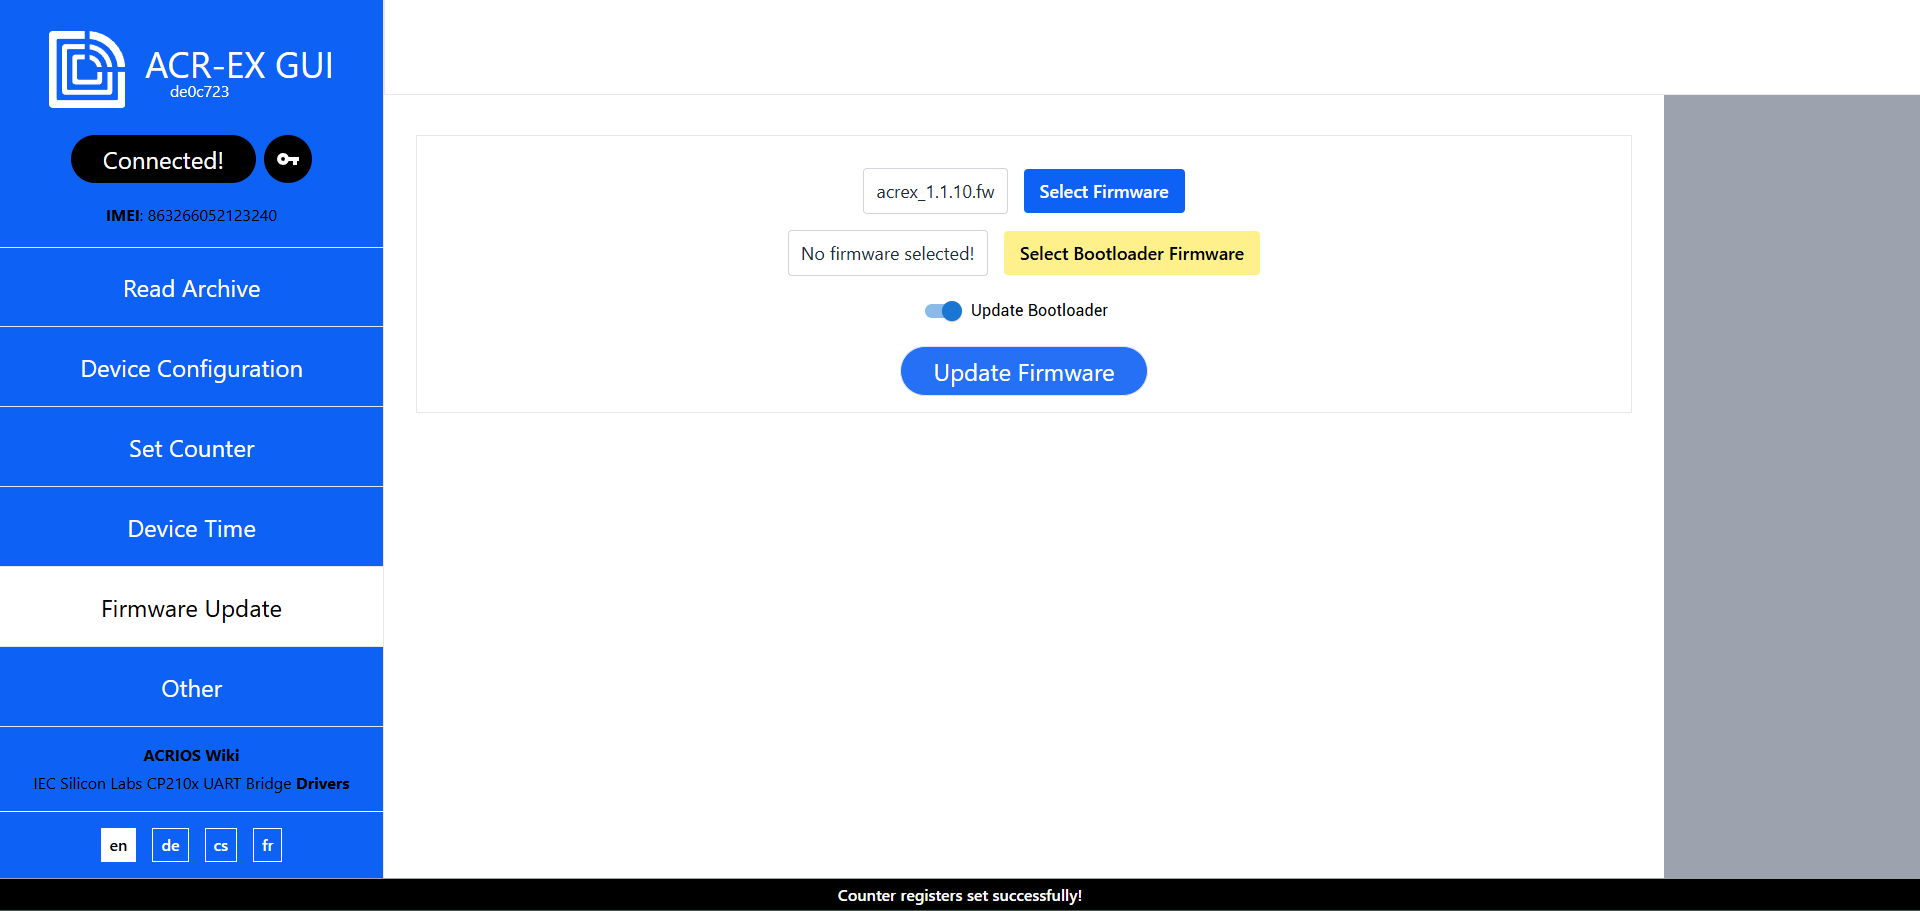
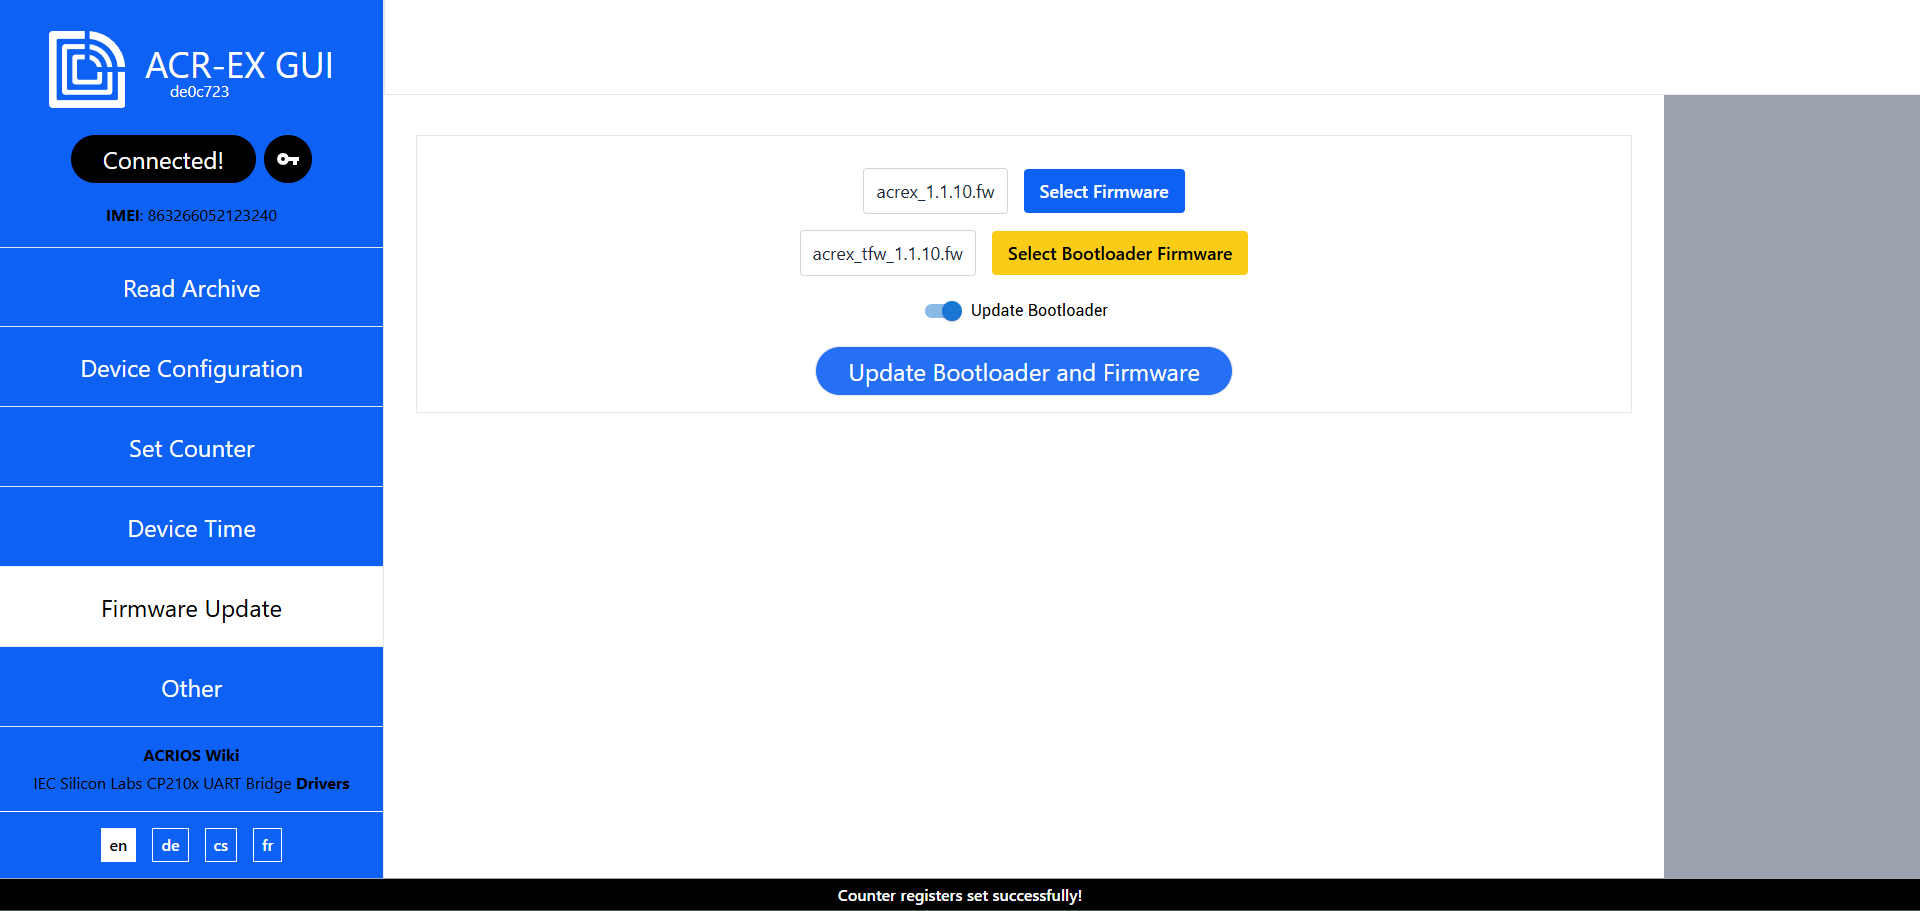
- If you selected the Update Bootloader option, you will need to select the bootloader file by clicking on the Select Bootloader Firmware button.
 info
infoBootloader firmware files are named
acrex_tfw_X.X.X.fw, whereX.X.Xis the version number. TheTFWin the filename stands for Transition Firmware. This type of firmware only updates the bootloader. It works by loading the new bootloader into application memory and updating the bootloader to the new version after the device is restarted.warningAfter the Bootloader update, only the bootloader is installed — the main application firmware is not present and must be uploaded manually.
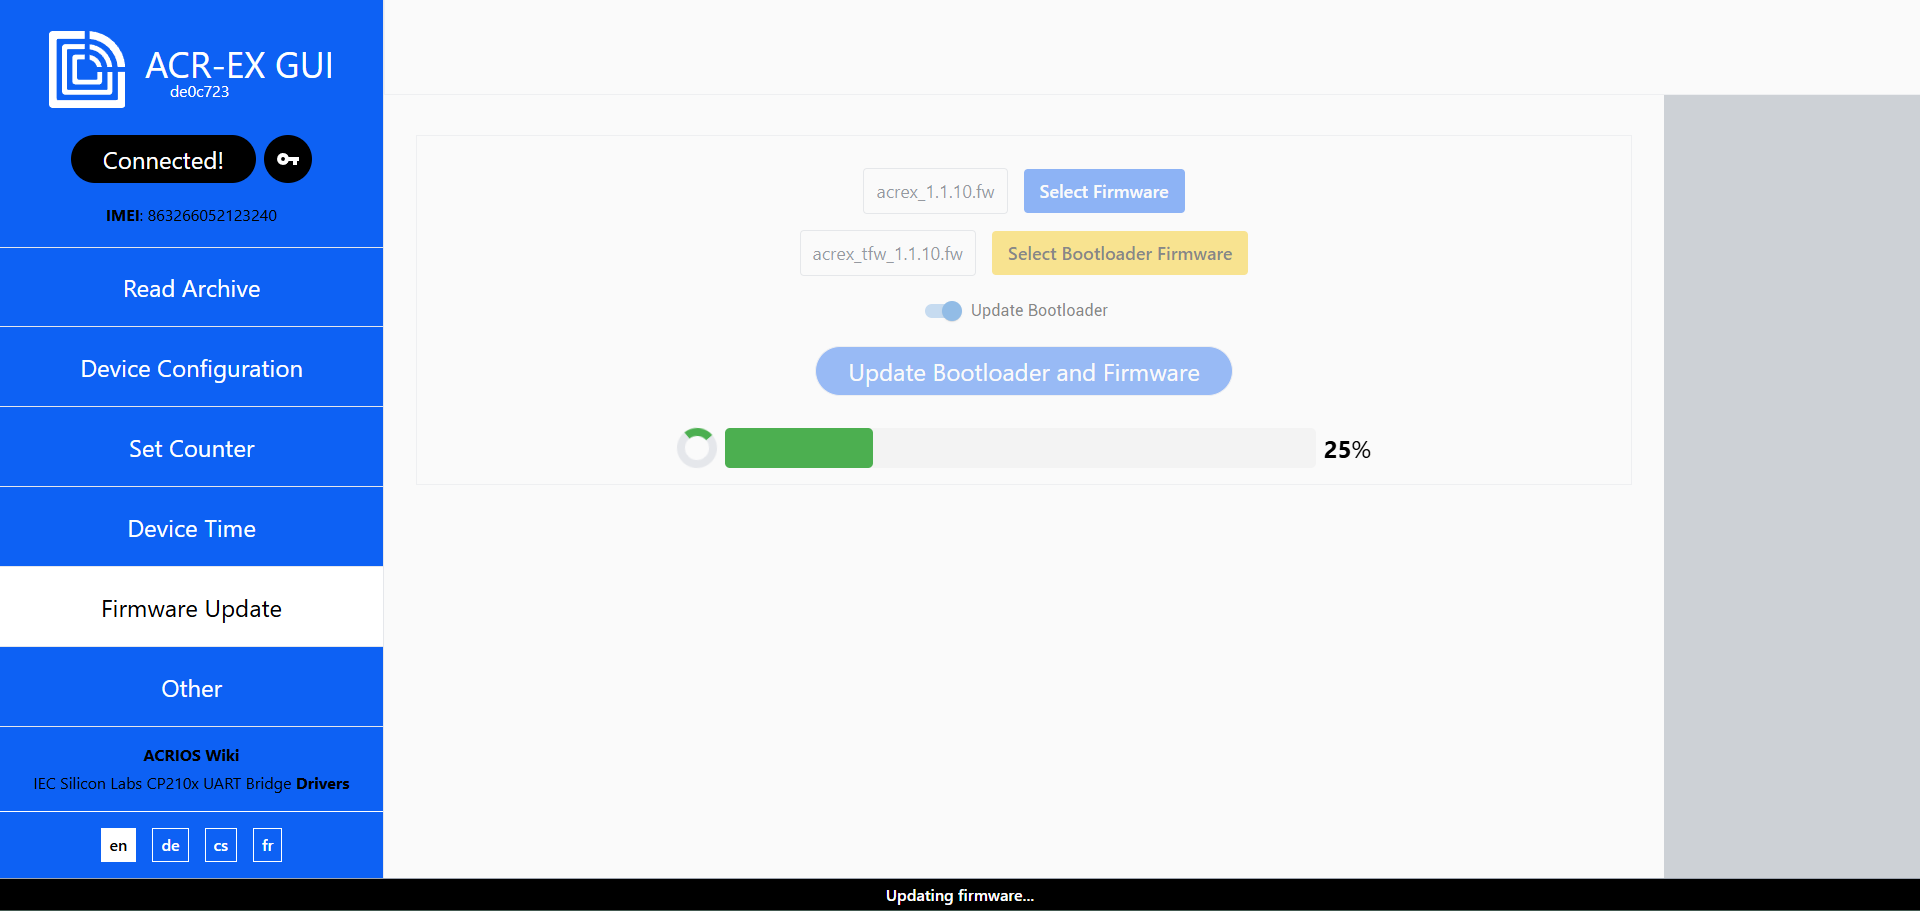
- After selecting both firmware files, you can start the update process by clicking on the Update Firmware button. The update process will start and you will see the progress bar. The bootloader is updated first.
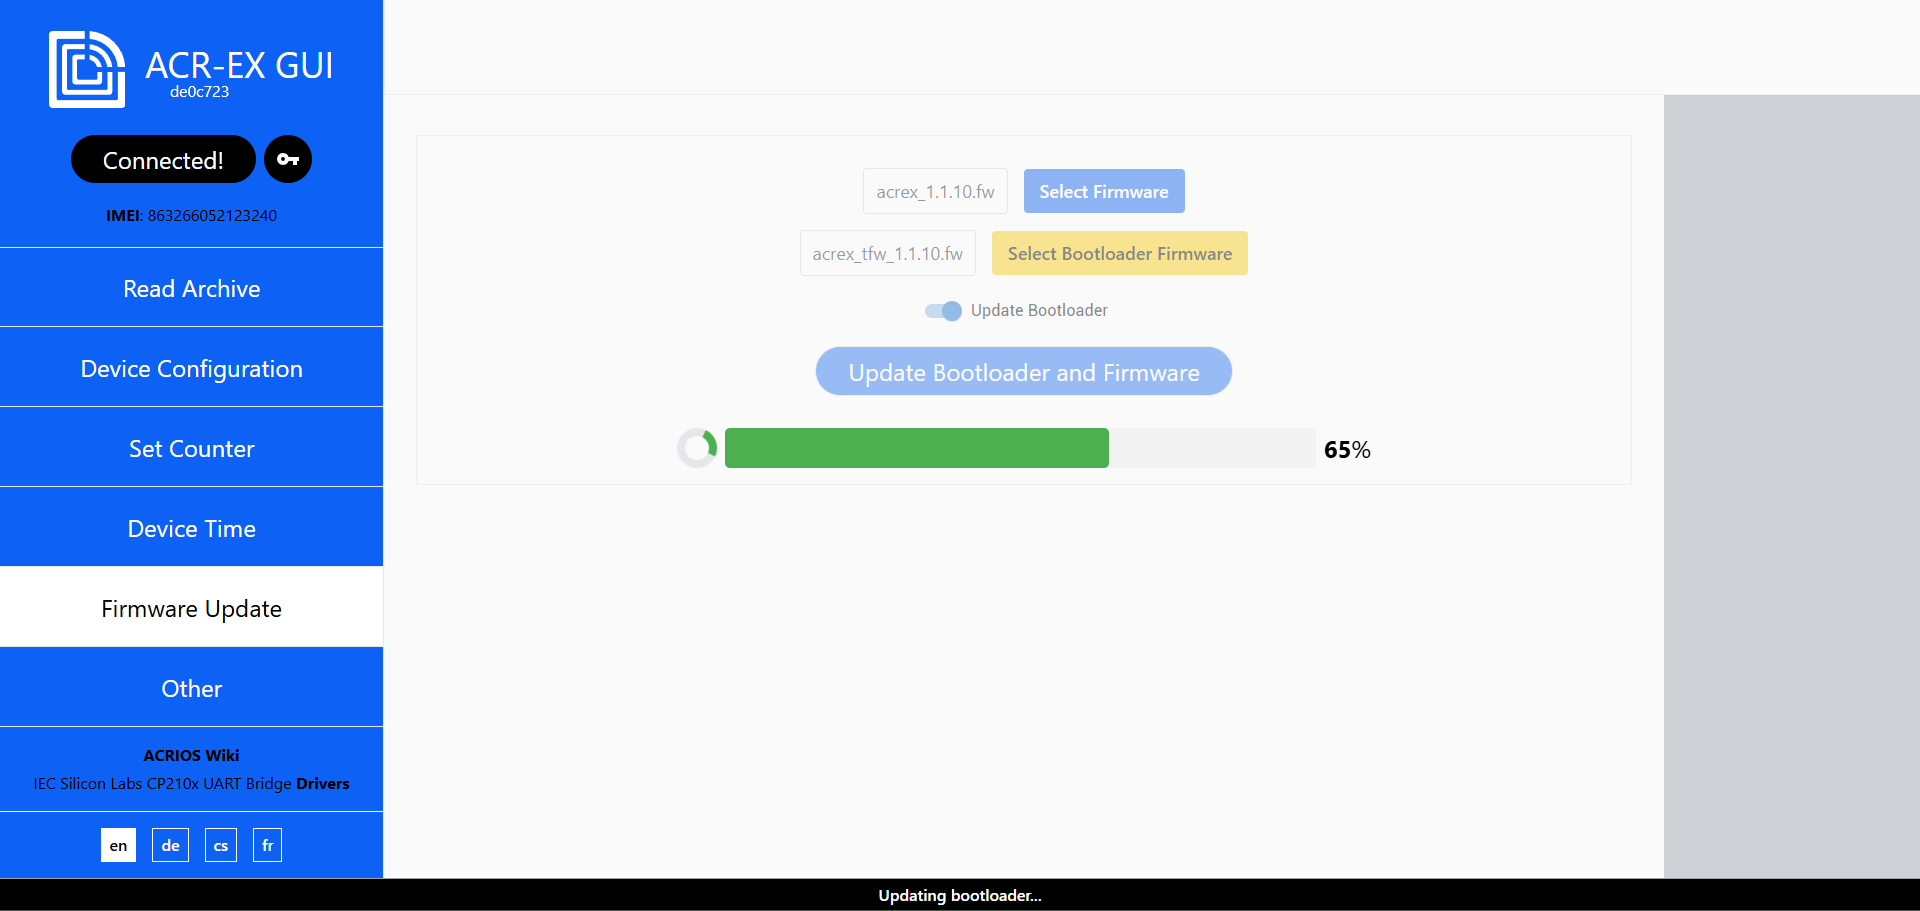
- The firmware update will start after the bootloader update is finished. You will see the progress bar for the firmware update.
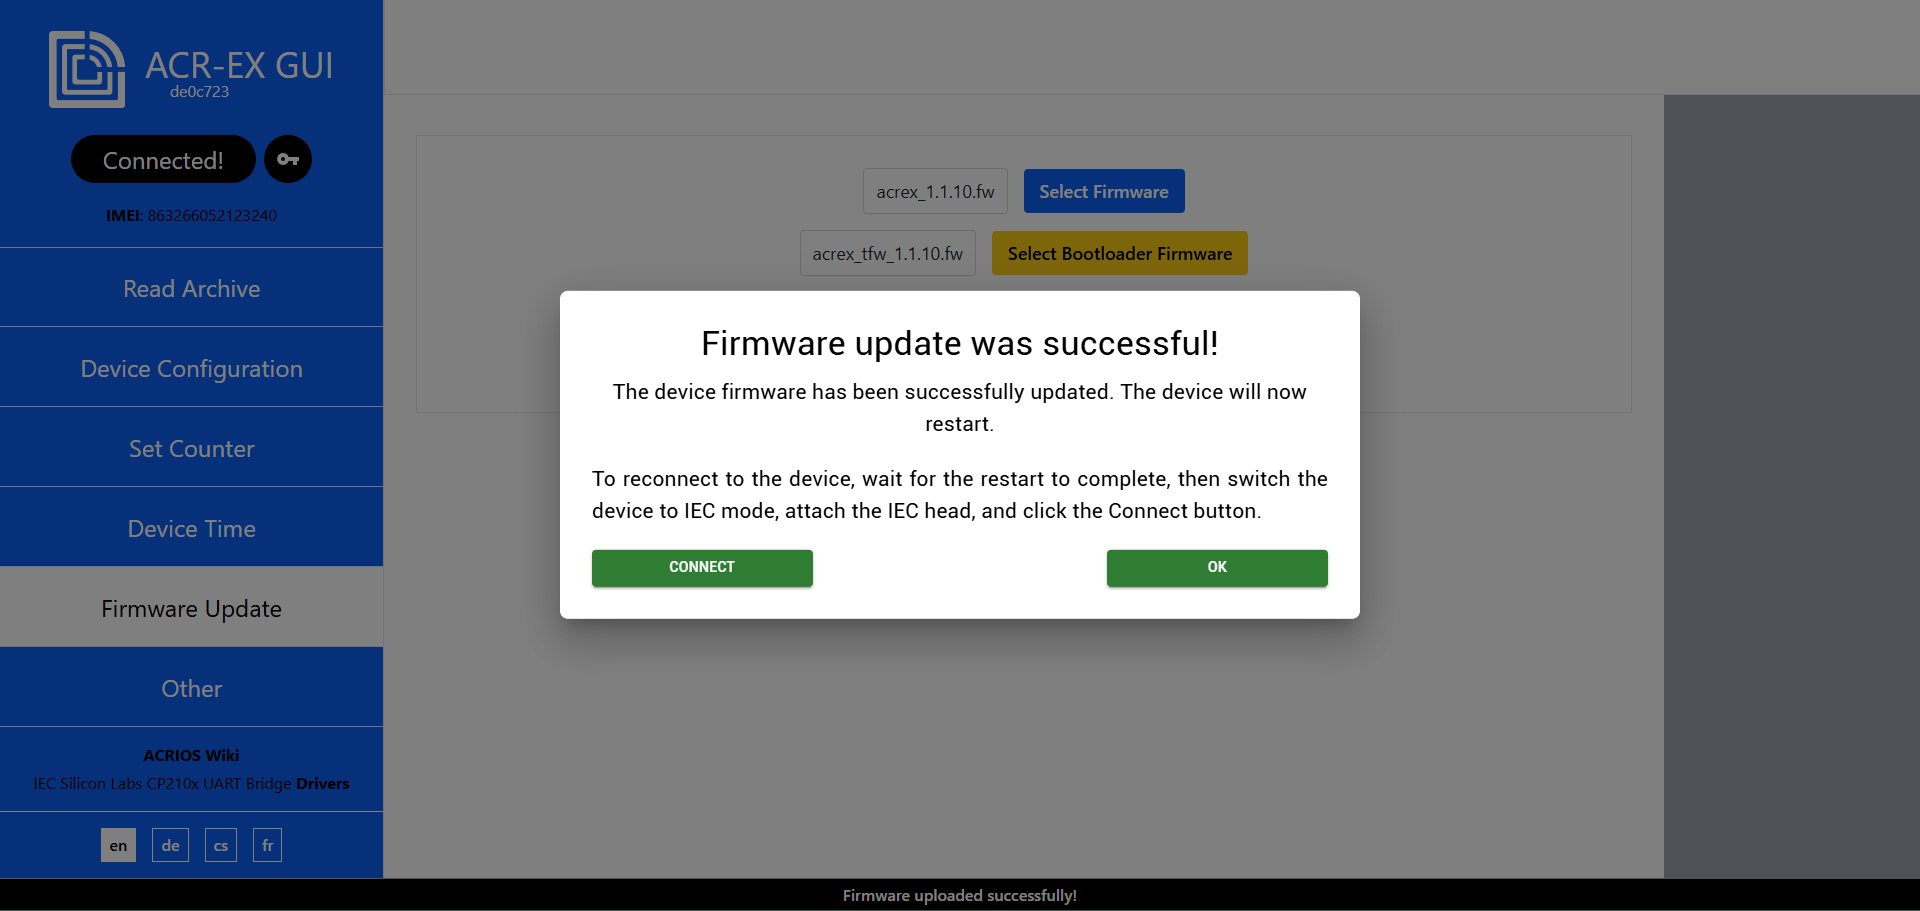
- After the firmware update is finished successfully, you should see the following screen.
Other actions
- Navigate to the Other tab.
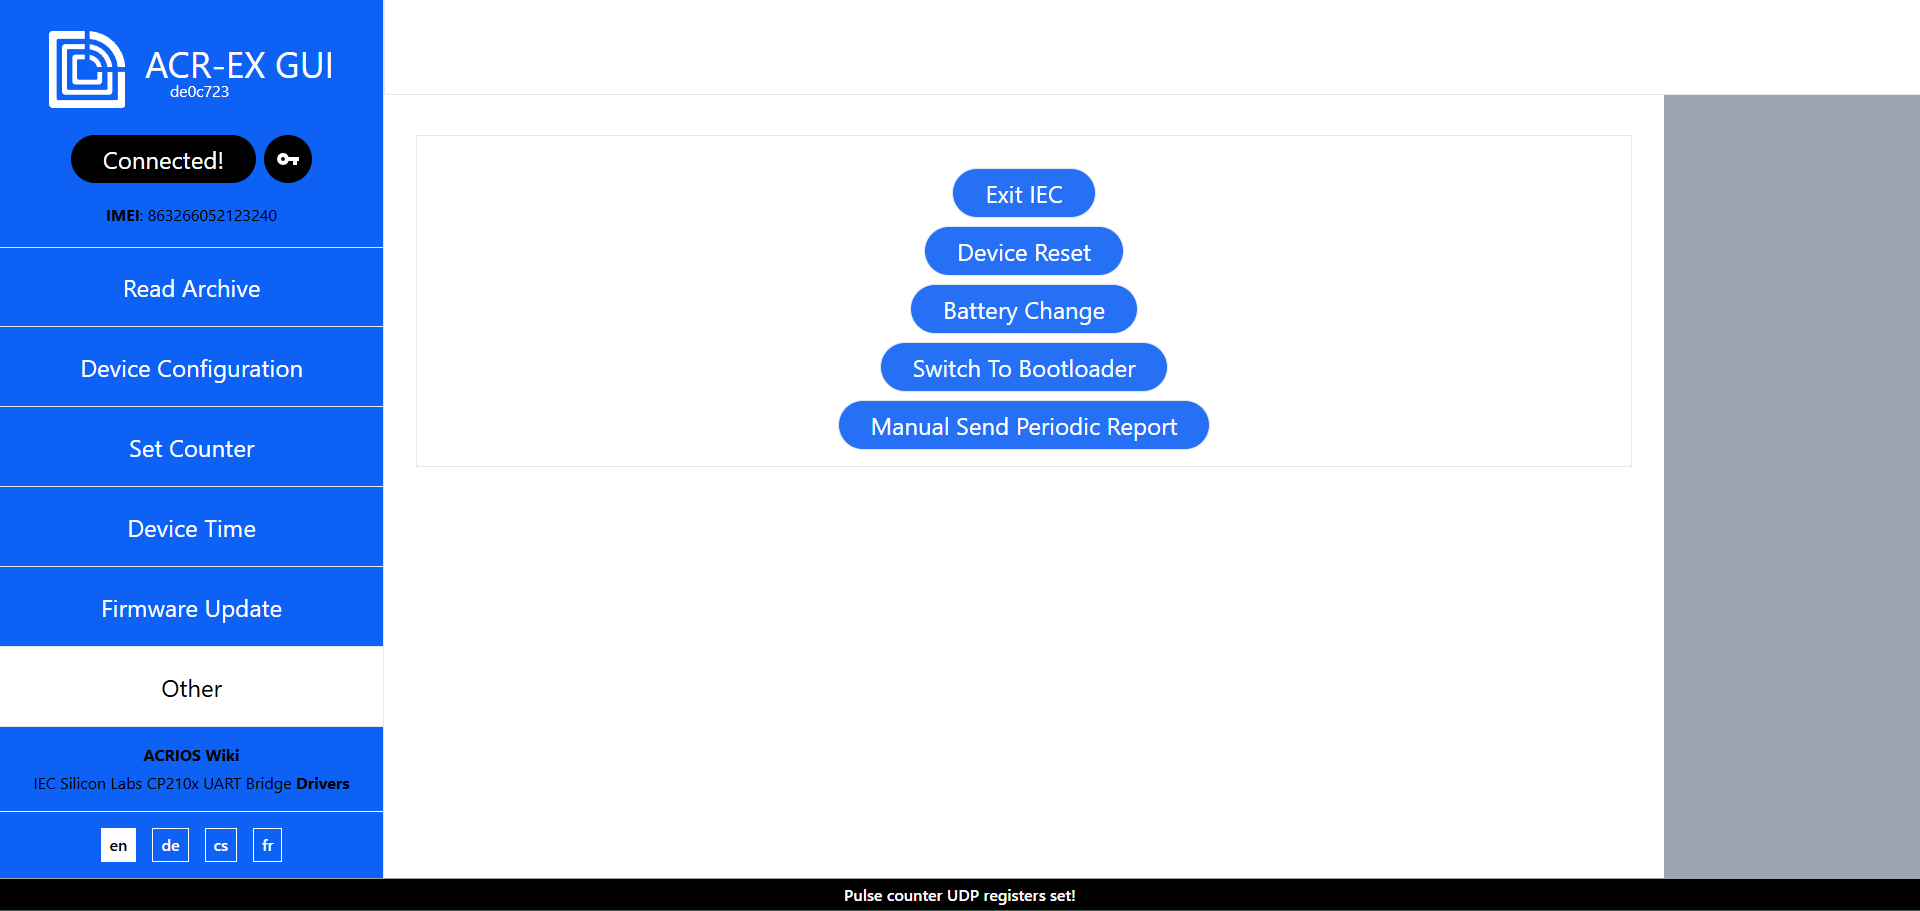
- Click on the appropriate button to perform the desired action:
- Exit IEC: Exits the IEC mode.
- Reset Device: Resets the device to factory settings.
- Battery Change: Resets the Coulomb Counter for consumed energy.
- Switch To Bootloader: Switches the device from application to bootloader.
- Manual Send Periodic Report: Sends a periodic report immediately, regardless of the configured periodic report interval.
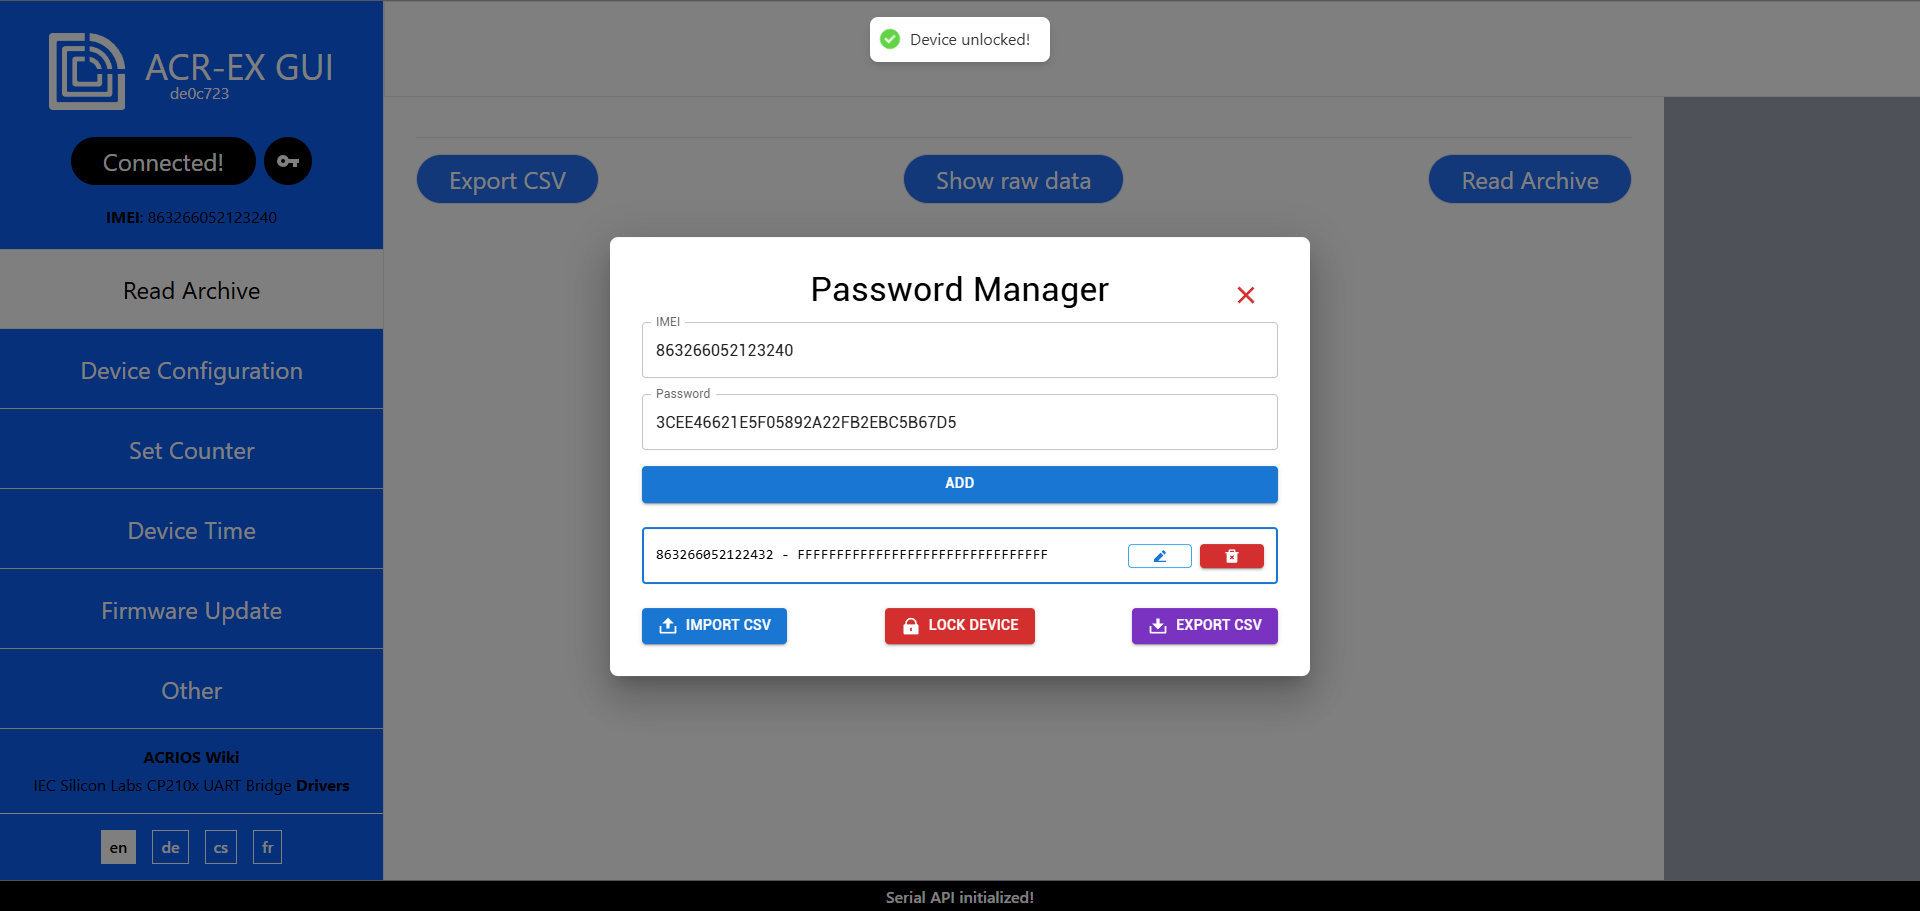
Password Manager
The Password Manager stores passwords in the local storage of your browser. This means the saved passwords are only available on the device and browser where they were added, and are not synchronized or stored on a server.
Locking and unlocking the device
- To open the Password Manager, click on the Key button next to the Connect button in the top left corner of the GUI.

- When the Password Manager is opened, device IMEI and password are automatically loaded into input fields. You can save them by clicking on the Add button or by locking the device.
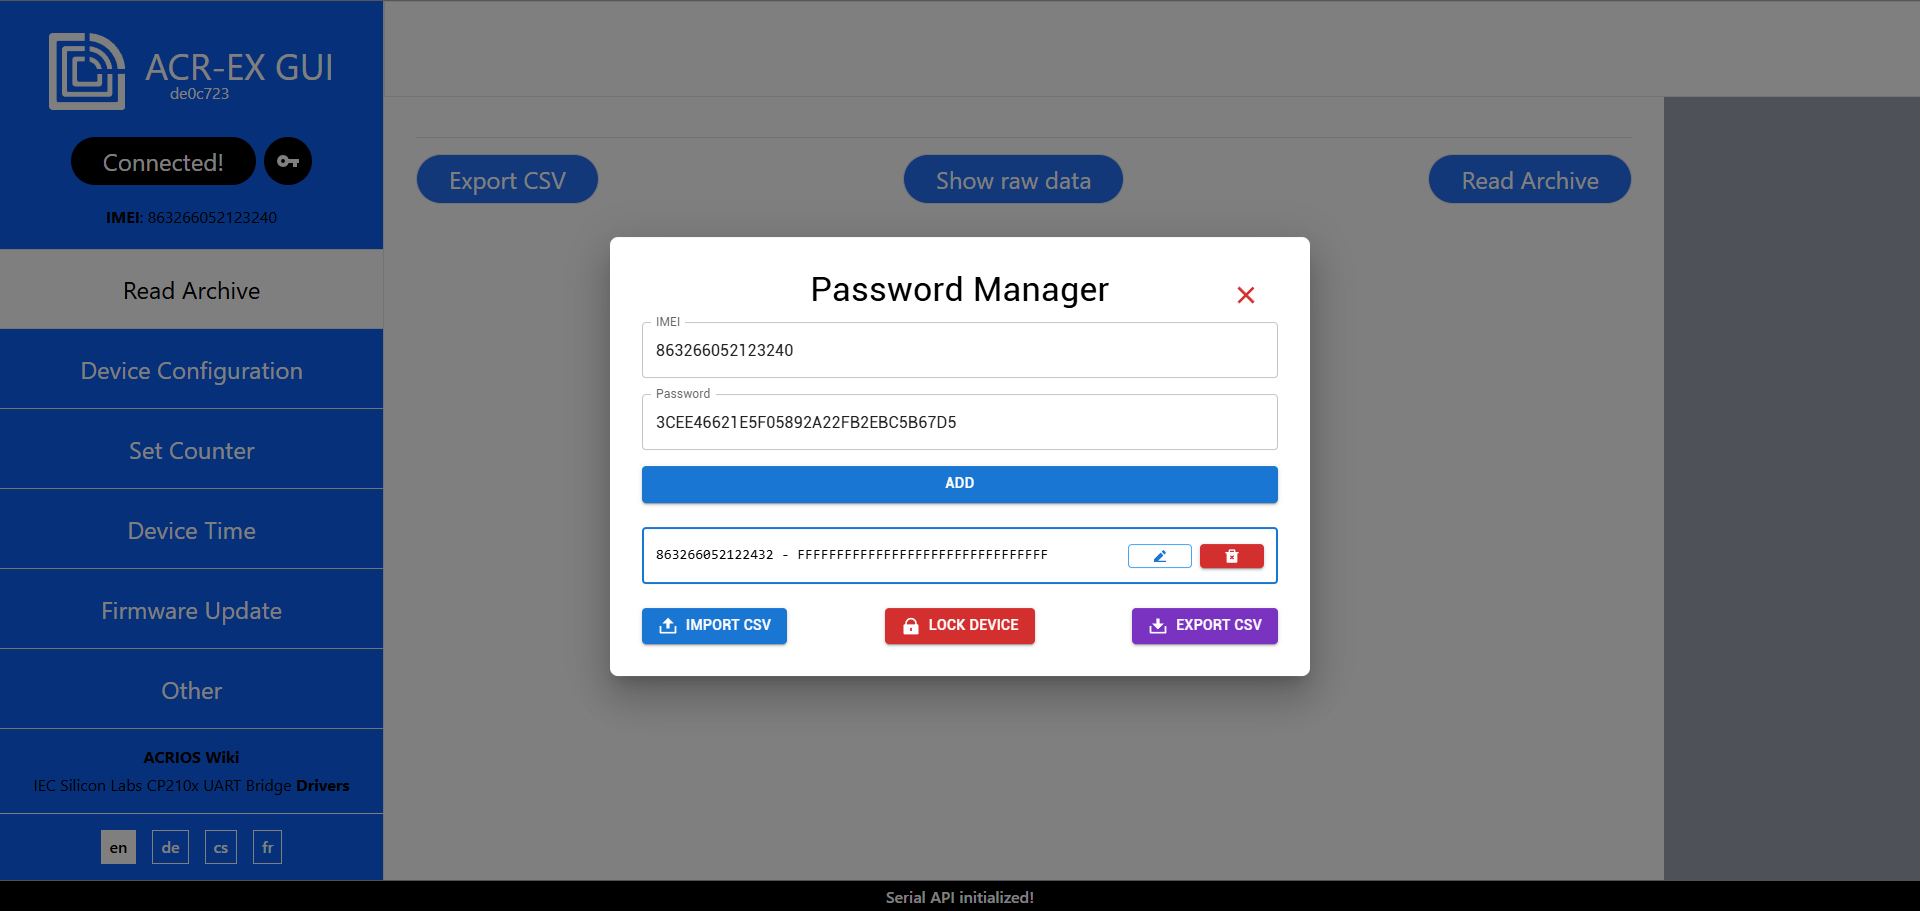
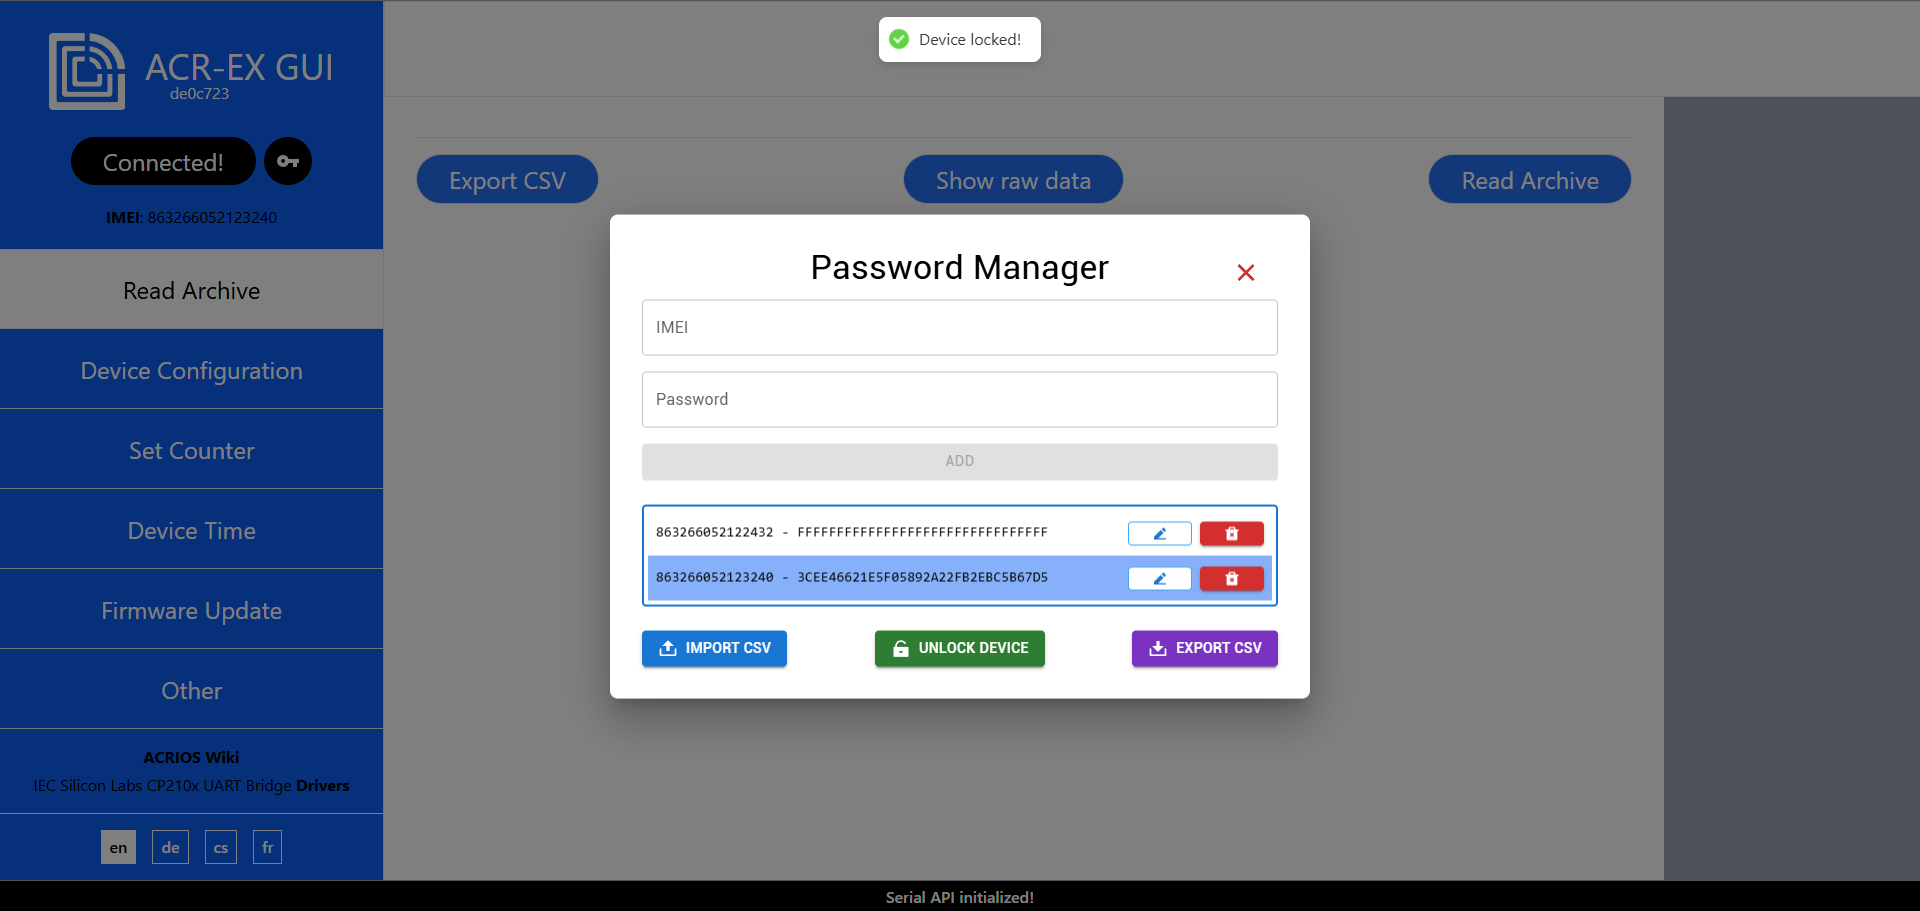
- To lock the device, click on the Lock Device button. The GUI checks if the password is correct and locks the device.
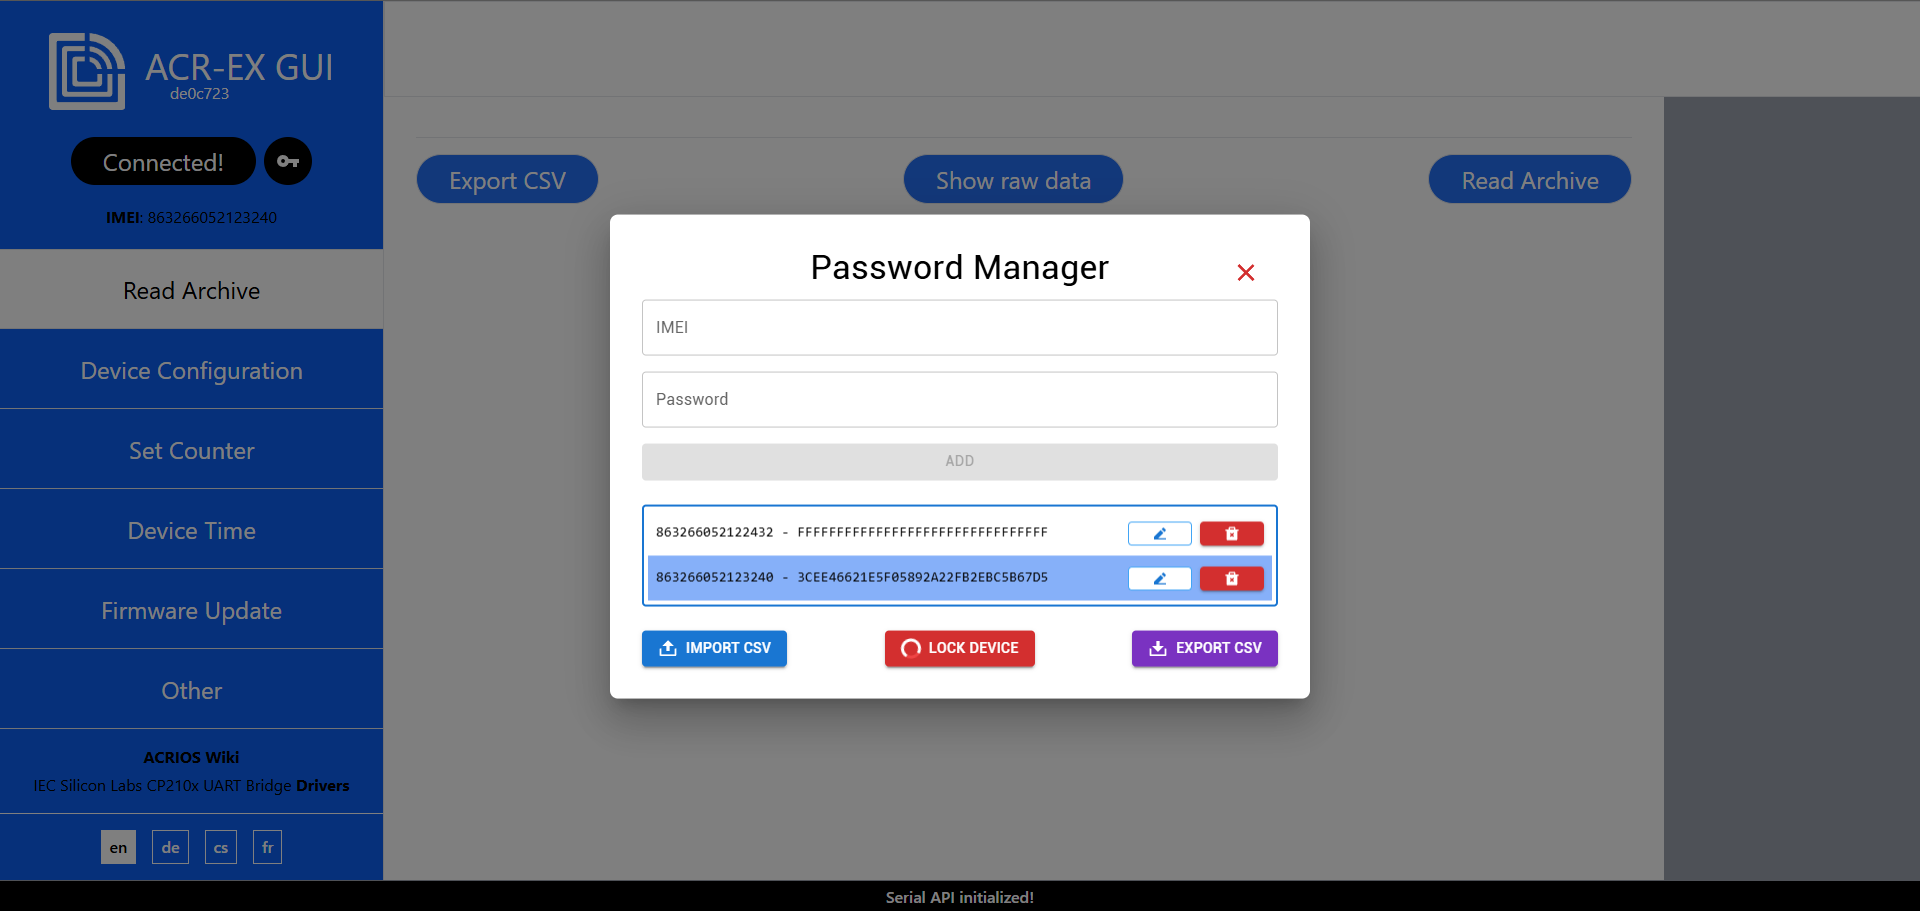
- When the device is locked, the Lock Device button will change to Unlock Device.
- To unlock the device, click on the Unlock Device button. The GUI tries to unlock the device with the saved password.
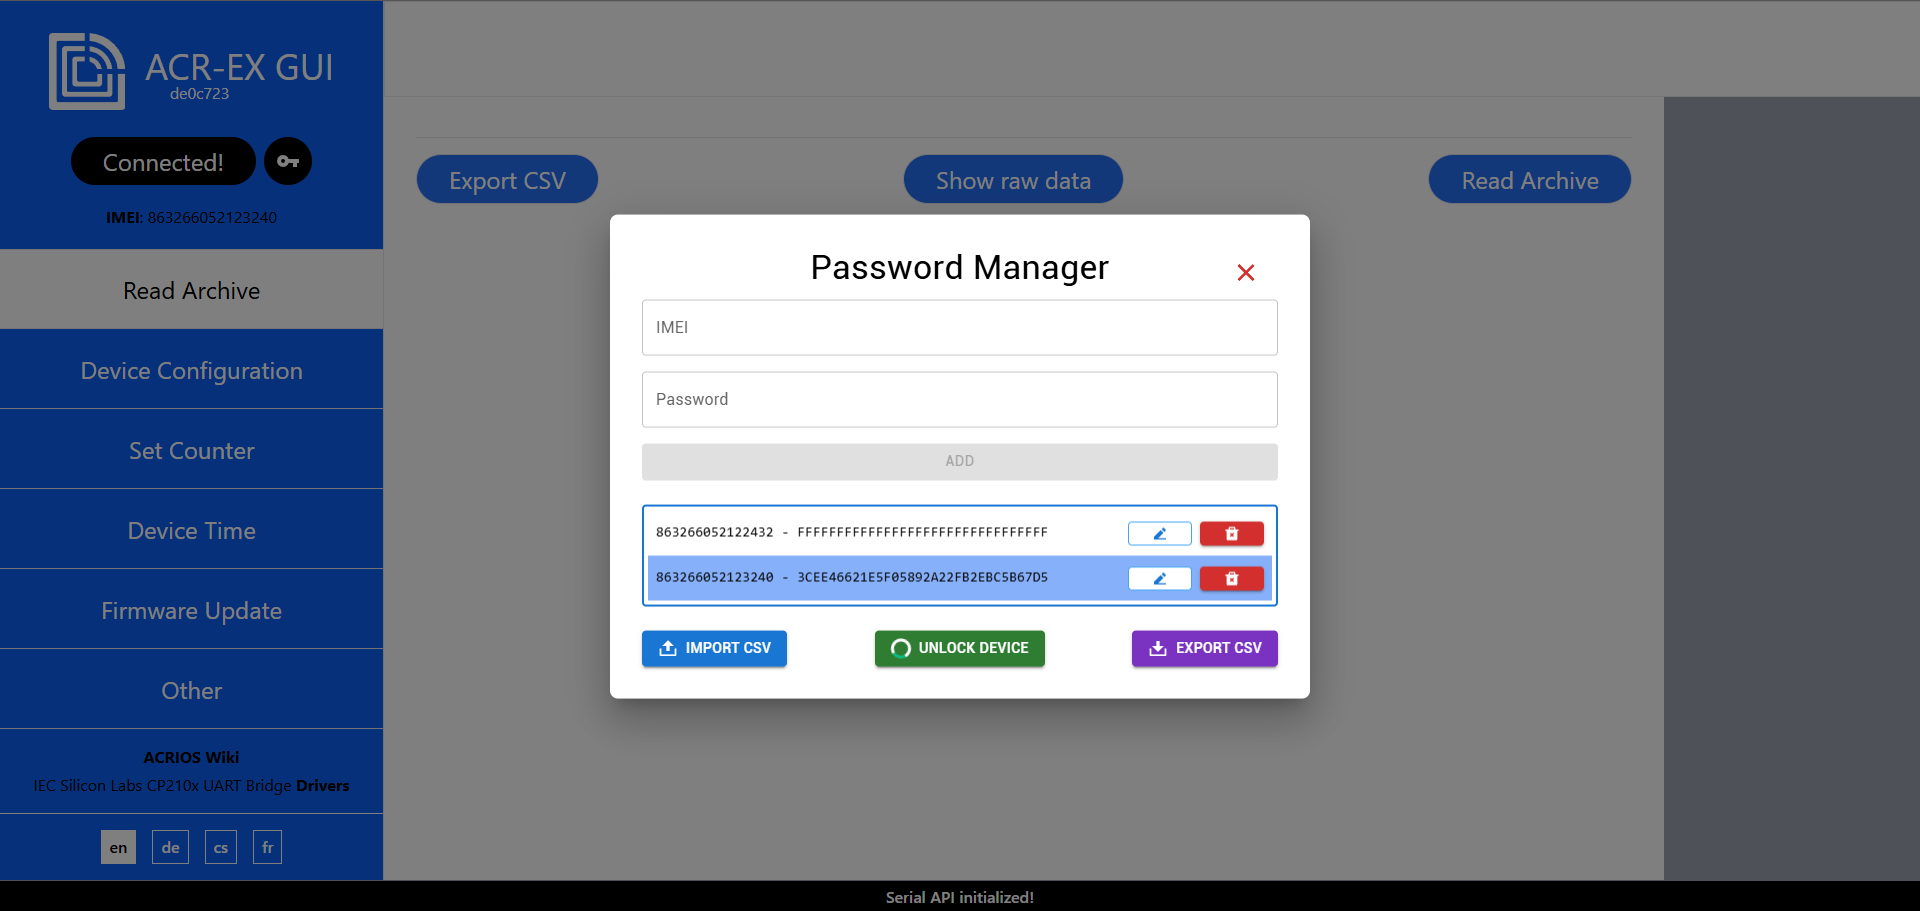
- If the password is correct, the device will be unlocked, the password will be removed from saved passwords, and the Unlock Device button will change back to Lock Device.
Importing and exporting passwords
- To import passwords, click on the Import CSV button and select the CSV file with passwords.
The CSV file should have the following format:
imei,password
863266052122432,FFFFFFFFFFFFFFFFFFFFFFFFFFFFFFFF
863266052123240,3CEE46621E5F05892A22FB2EBC5B67D5 - After selecting the CSV file, the passwords will be imported and displayed in the table.
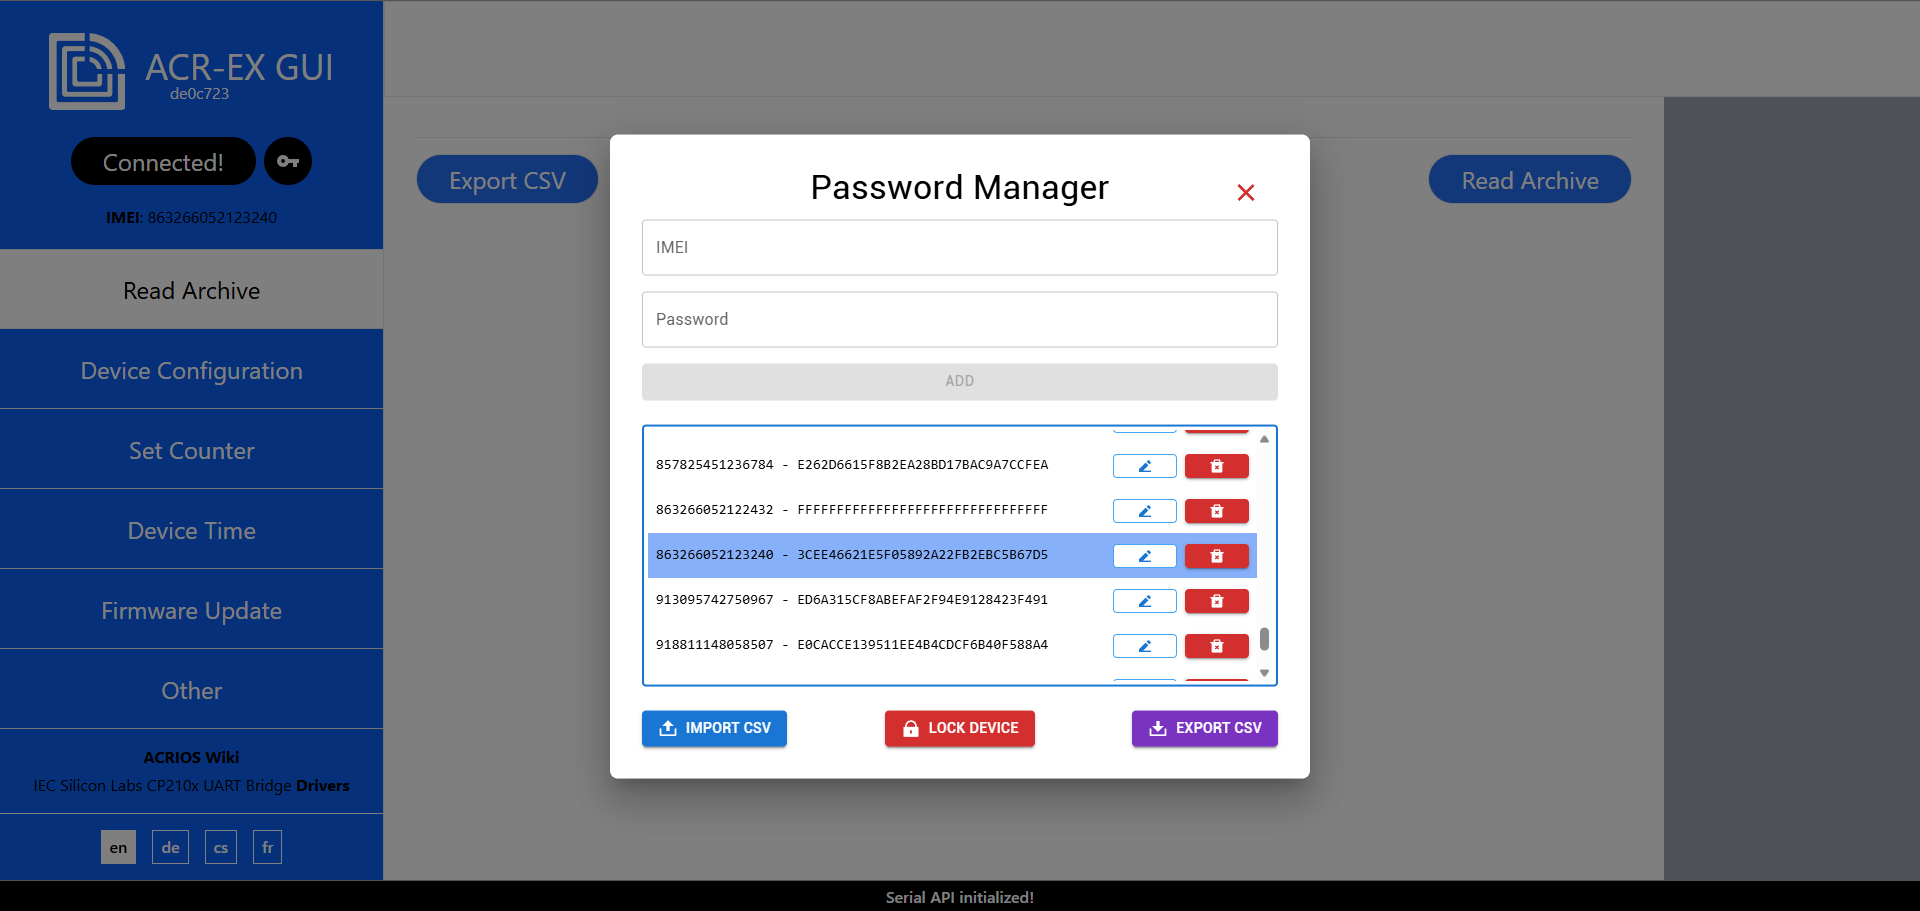
- To export passwords, click on the Export CSV button. The passwords will be exported to a CSV file named
acr-ex_passwords.csvwith the same format as described above.