ACR-CV-101L-I4-D
S0 Pulse Input to LoRaWAN Battery Powered Converter
Quick start guide for S0 pulse input to LoRaWAN battery powered converter ACR-CV-101L-I4-D.


| Ordering Code | Network | Protocol | Power Source | Max. Devices |
|---|---|---|---|---|
| ACR-CV-101L-I4-D | LoRaWAN | S0 pulse counter | D-Cell/Double D-Cell battery | 4 |
For further technical details, check the datasheet for L-I4-D.
Installation Process
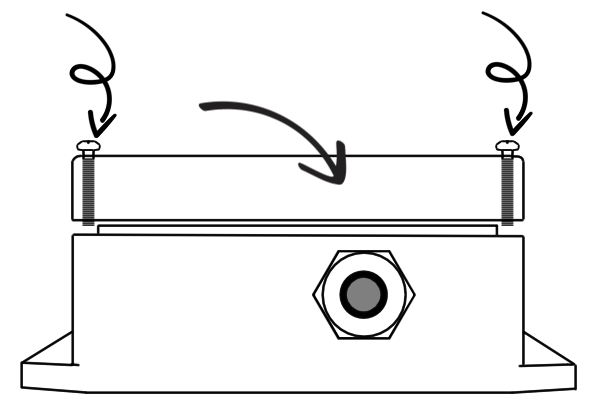
1. Unscrew the 4 screws holding the lid, remove it and put it aside.


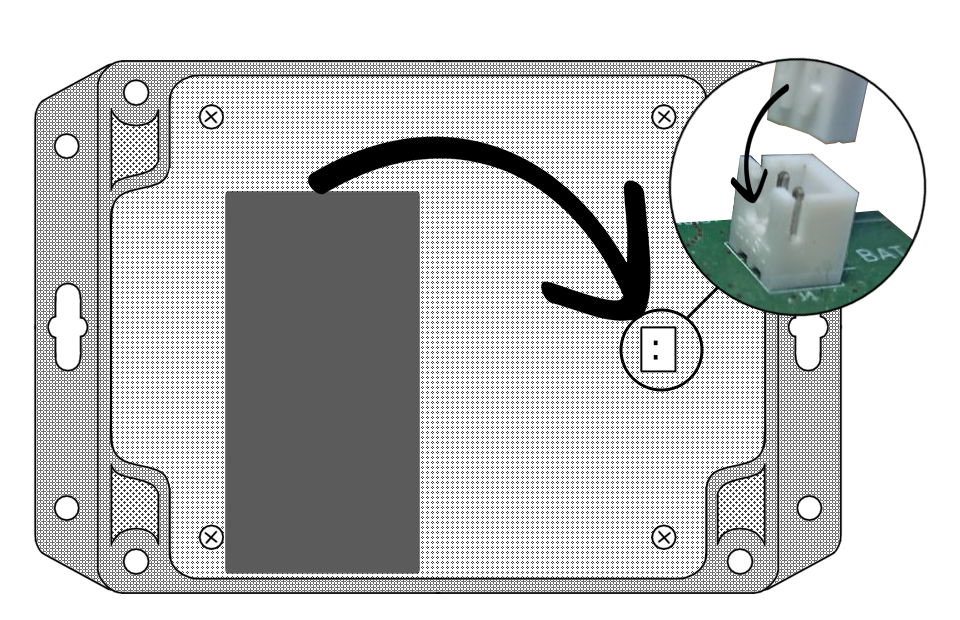
2. Place the battery outside of the box (if needed), run the interface wires through the cable gland and connect them to the Euroclamp 2-piece connector.


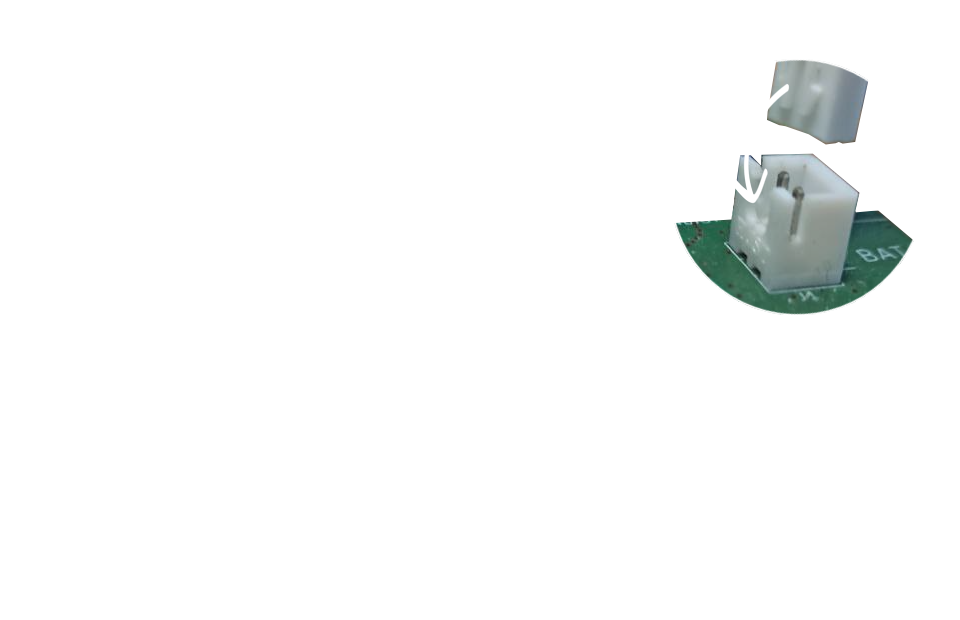
3. Connect the battery via JST-XH connector and place it into the box.
4. Place the lid back on the box, align it and tighten the screws. The foam in the lid should hold the battery in place.

5. Screw on the LoRaWAN antenna.


6. Secure the device with screws and Mounting holes or via other means such as cable ties.


7. And finally, register the device to the LoRaWAN network.
Additional Tips for an Ideal Functionality
- The converter is designed for both indoor and outdoor use. For an outdoor installation, place the converter with the antenna pointing down.
-
Remote configuration of the converter is possible using tools provided by ACRIOS Systems s.r.o. Check the tools section, or contact us at info@acrios.com.
-
When handling the device without the lid on, it is essential to avoid contact with liquids. Never place the device on conductive pads, and do not touch the components on the device unnecessarily.
-
For the correct functioning of the device, it is necessary to have sufficient coverage of the LoRaWAN network at the installation site.
-
To unplug the battery without much effort, use small pliers.
Device Configuration
There are two ways to configure the device:
- Local configuration via configuration cable - requires:
- 3.5mm jack to USB adapter (see here)
- Local GUI (download here)
GUI Download Explanation
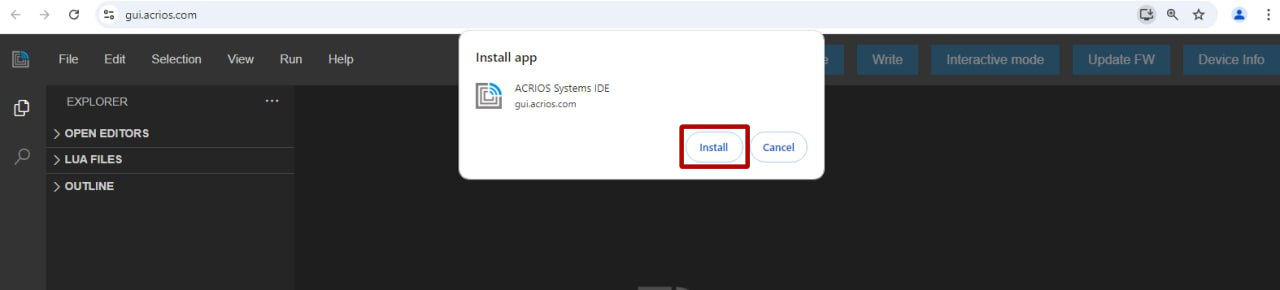
- Open GUI at gui.acrios.com.
❗Note, that our GUI is compatible with Chromium based browsers only (we recommend Google Chrome).
- Click at an icon in the upper left corner and click on "install".

- The local UI should now install and open, but you can close it and open it with the help of an icon that should be on your desktop.
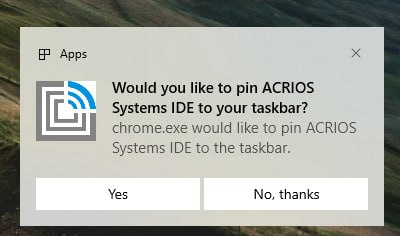
- The GUI also prompts you to pin it on the task bar, if you wish to do so.
- Remote configuration via online ACRIOS GUI interface at gui.acrios.com
❗Note, that this may require modified Lua script. Contact us at support@acrios.com for further details.
Local Configuration
Universal Video-Guide
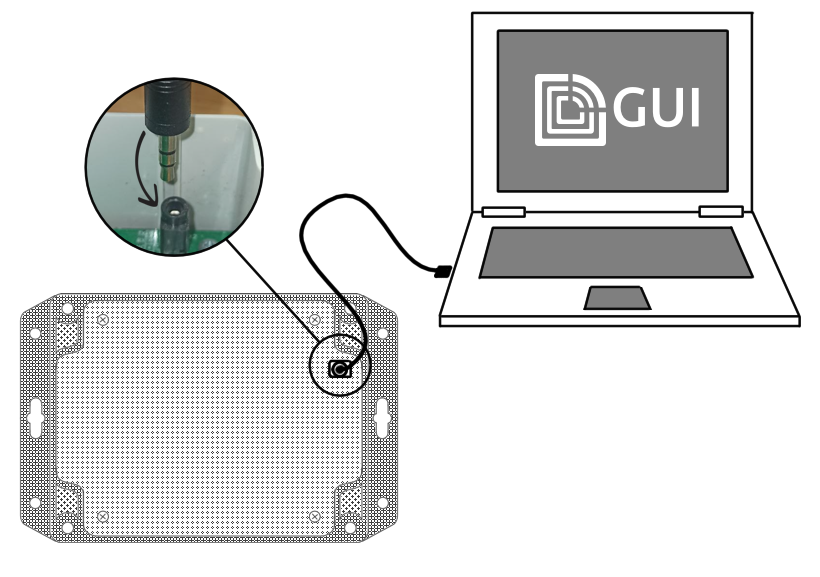
1. Insert the 3.5mm jack of the ACR-CONFIG cable into the 3.5mm jack connector on the board and connect it to a computer.

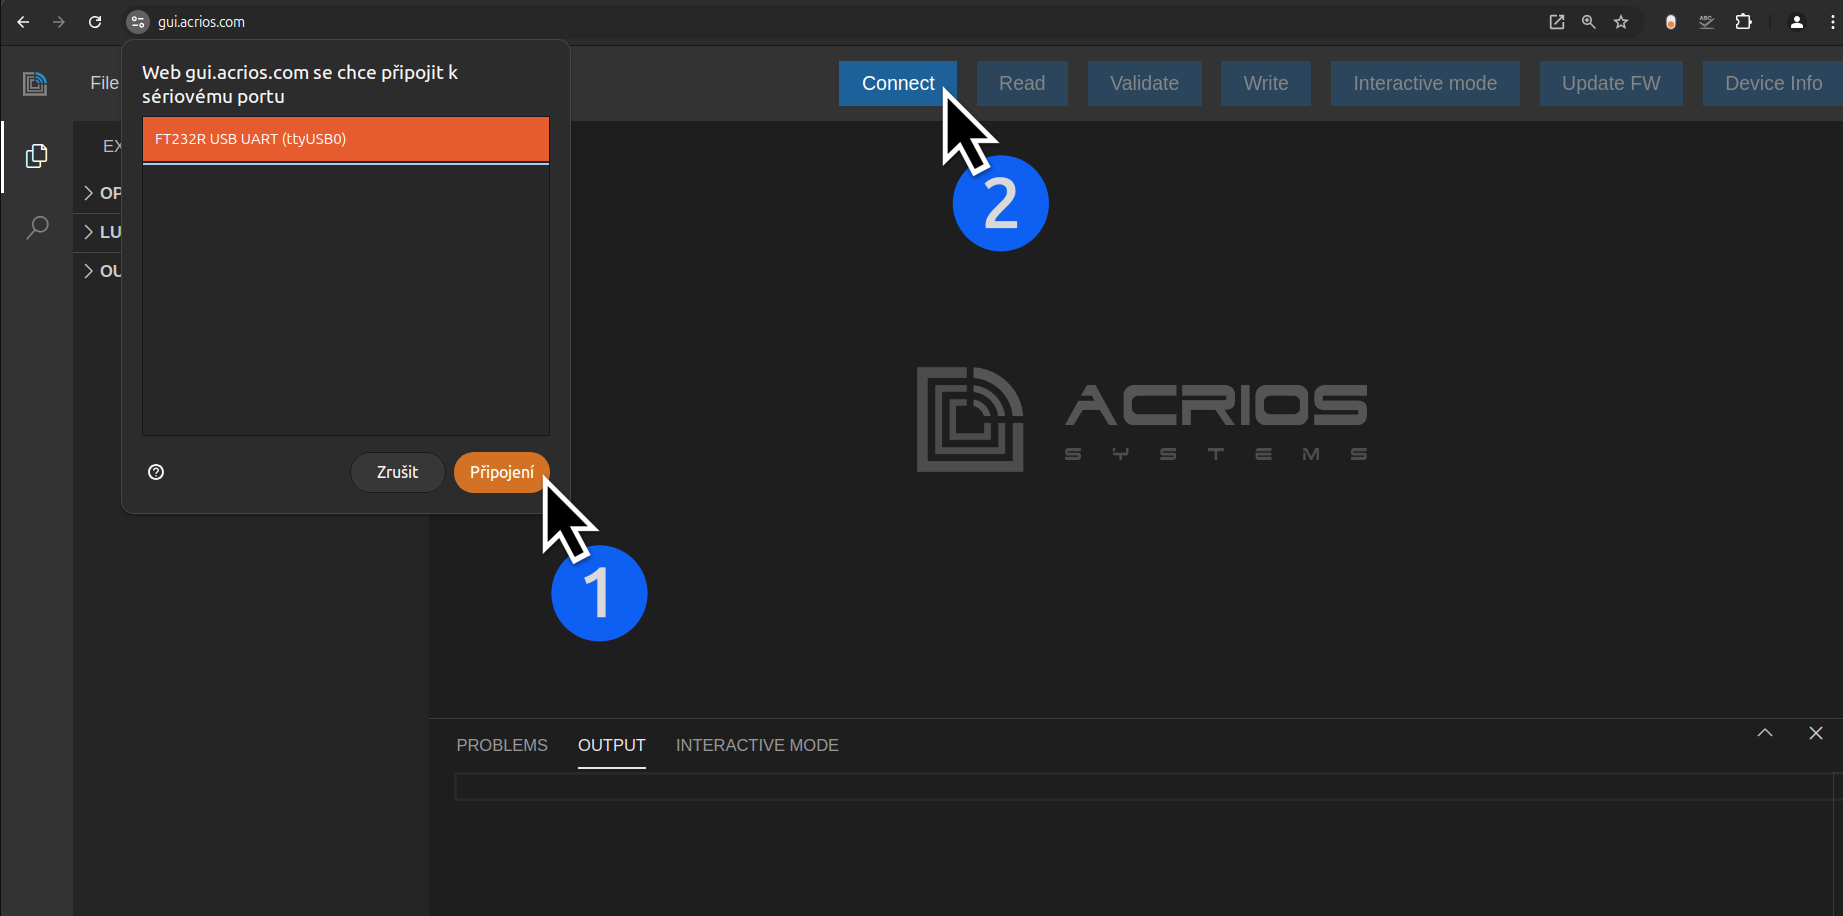
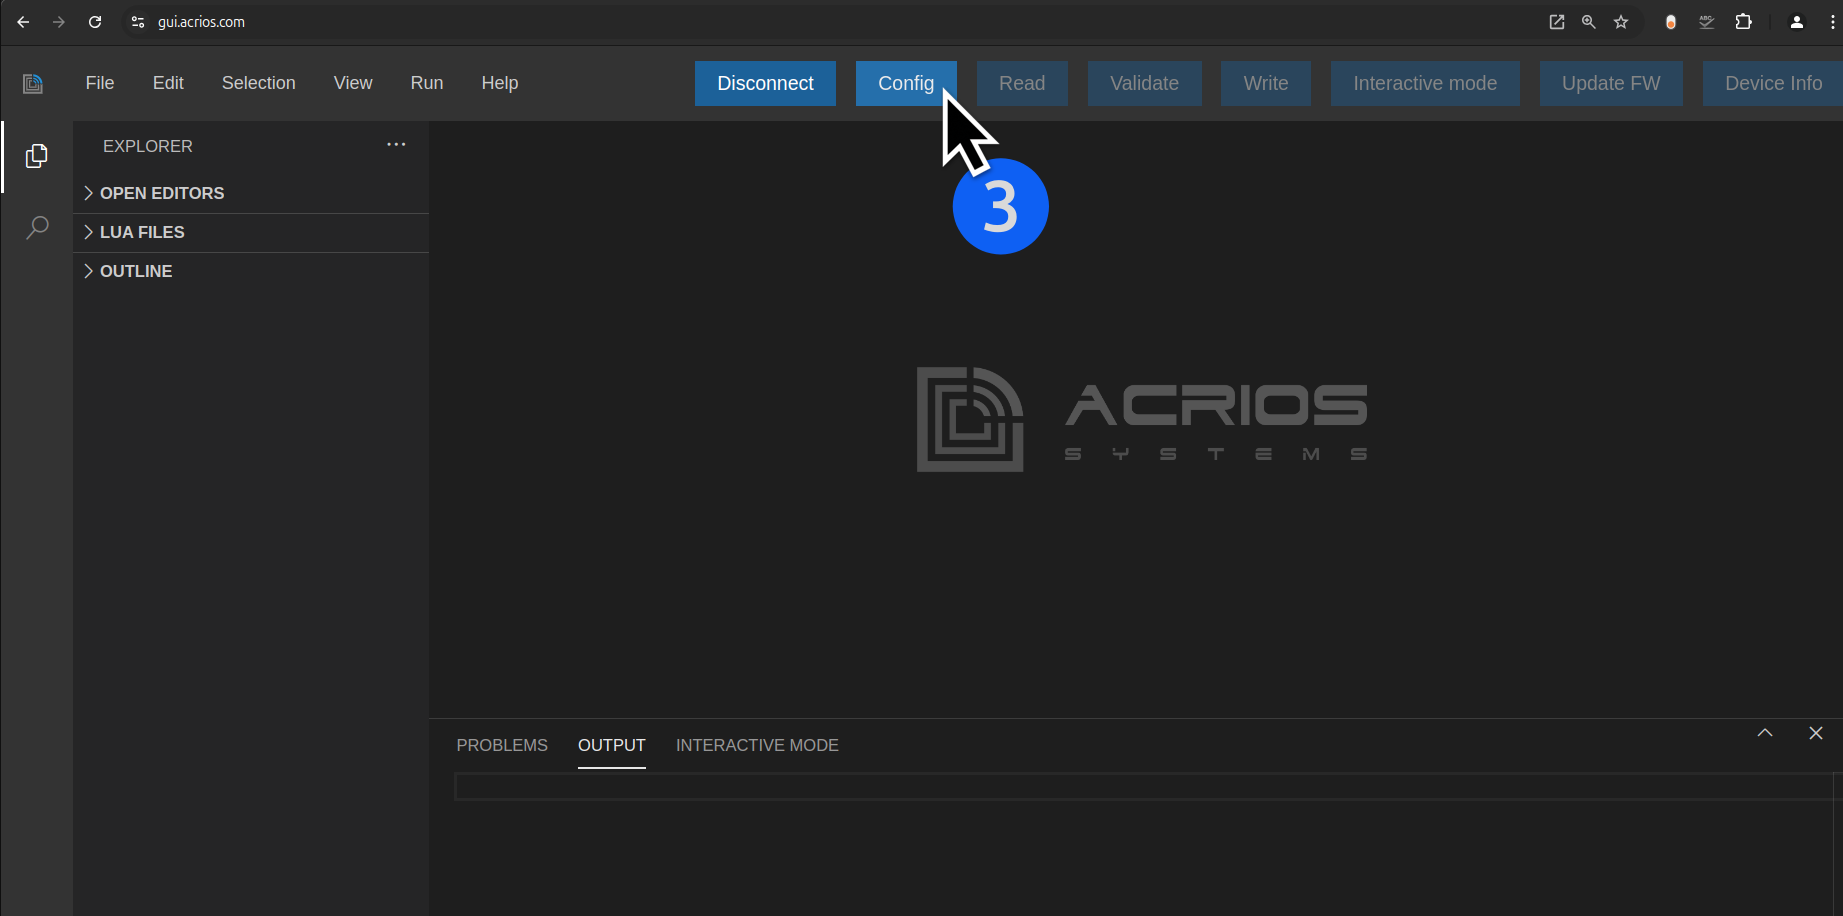
2. Launch the GUI, select a serial port, "Connect" to it and click on the "Connect" button in the ACRIOS GUI.
3. Now press the "Config" button.
4. Power the device ON by connecting the power source or RESET it by repeatedly pressing the button in quick succession IN CASE it is ON already.
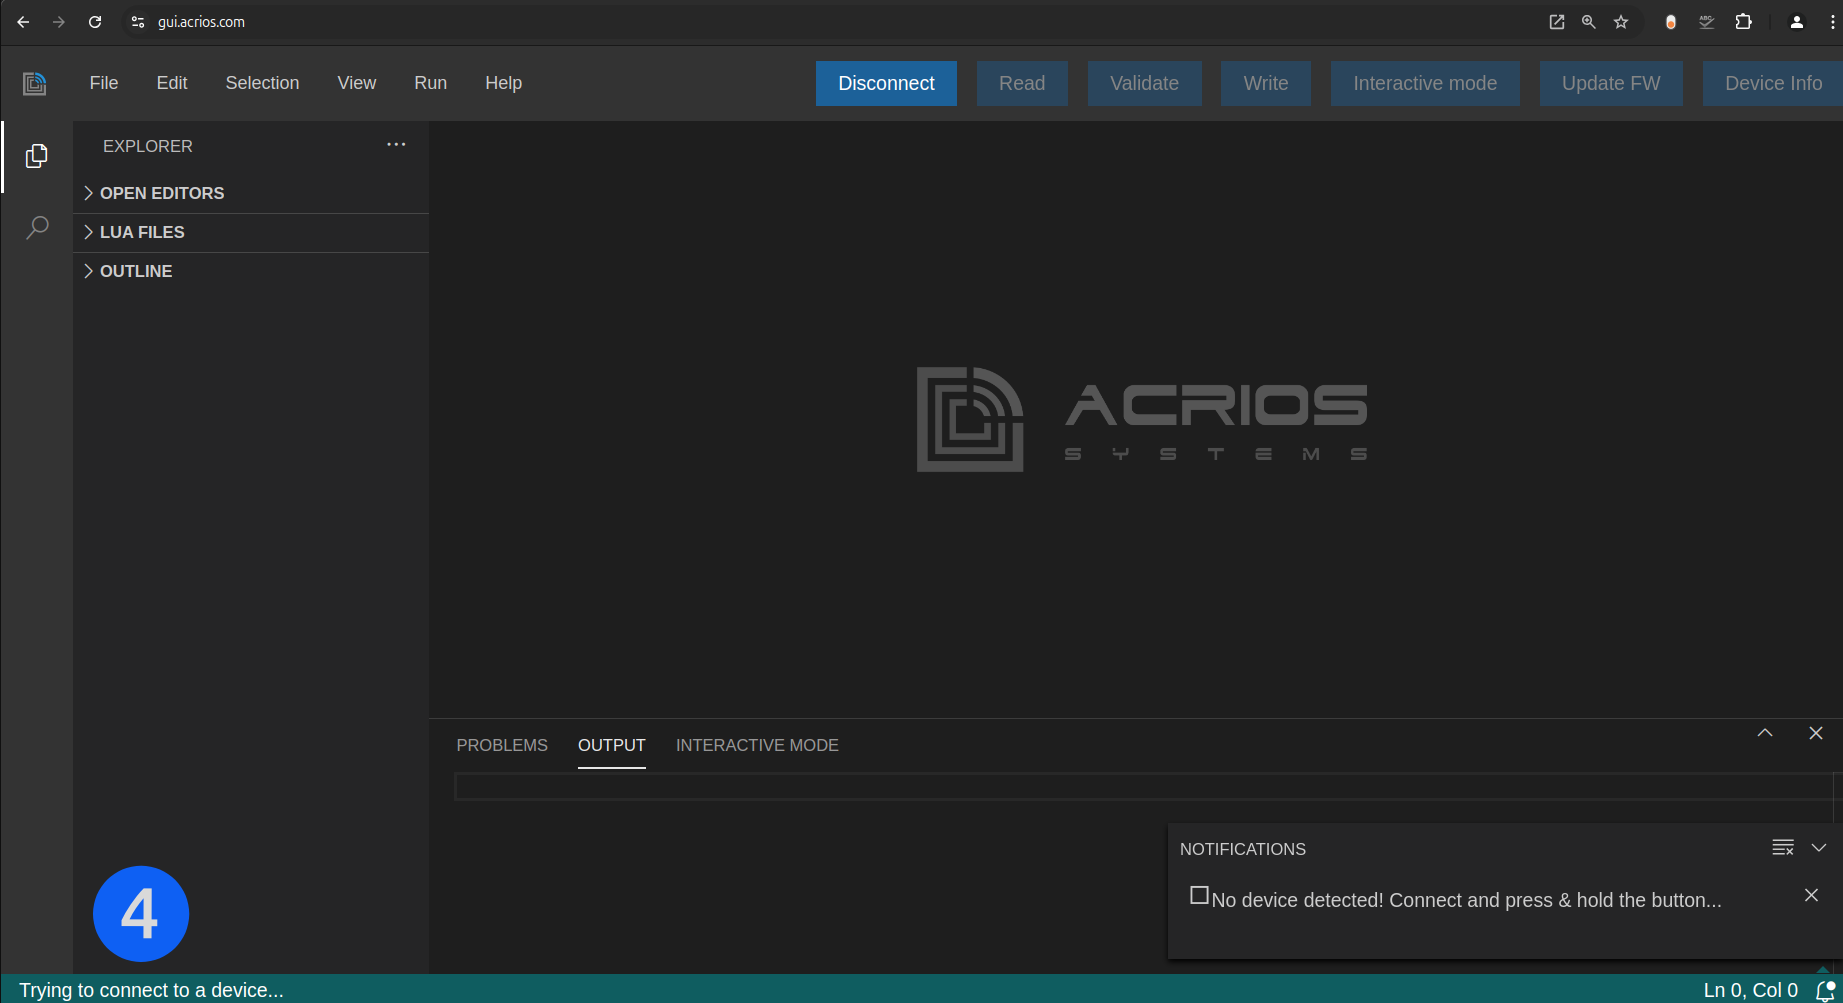
Powering ON the Device
RESETTING the Device


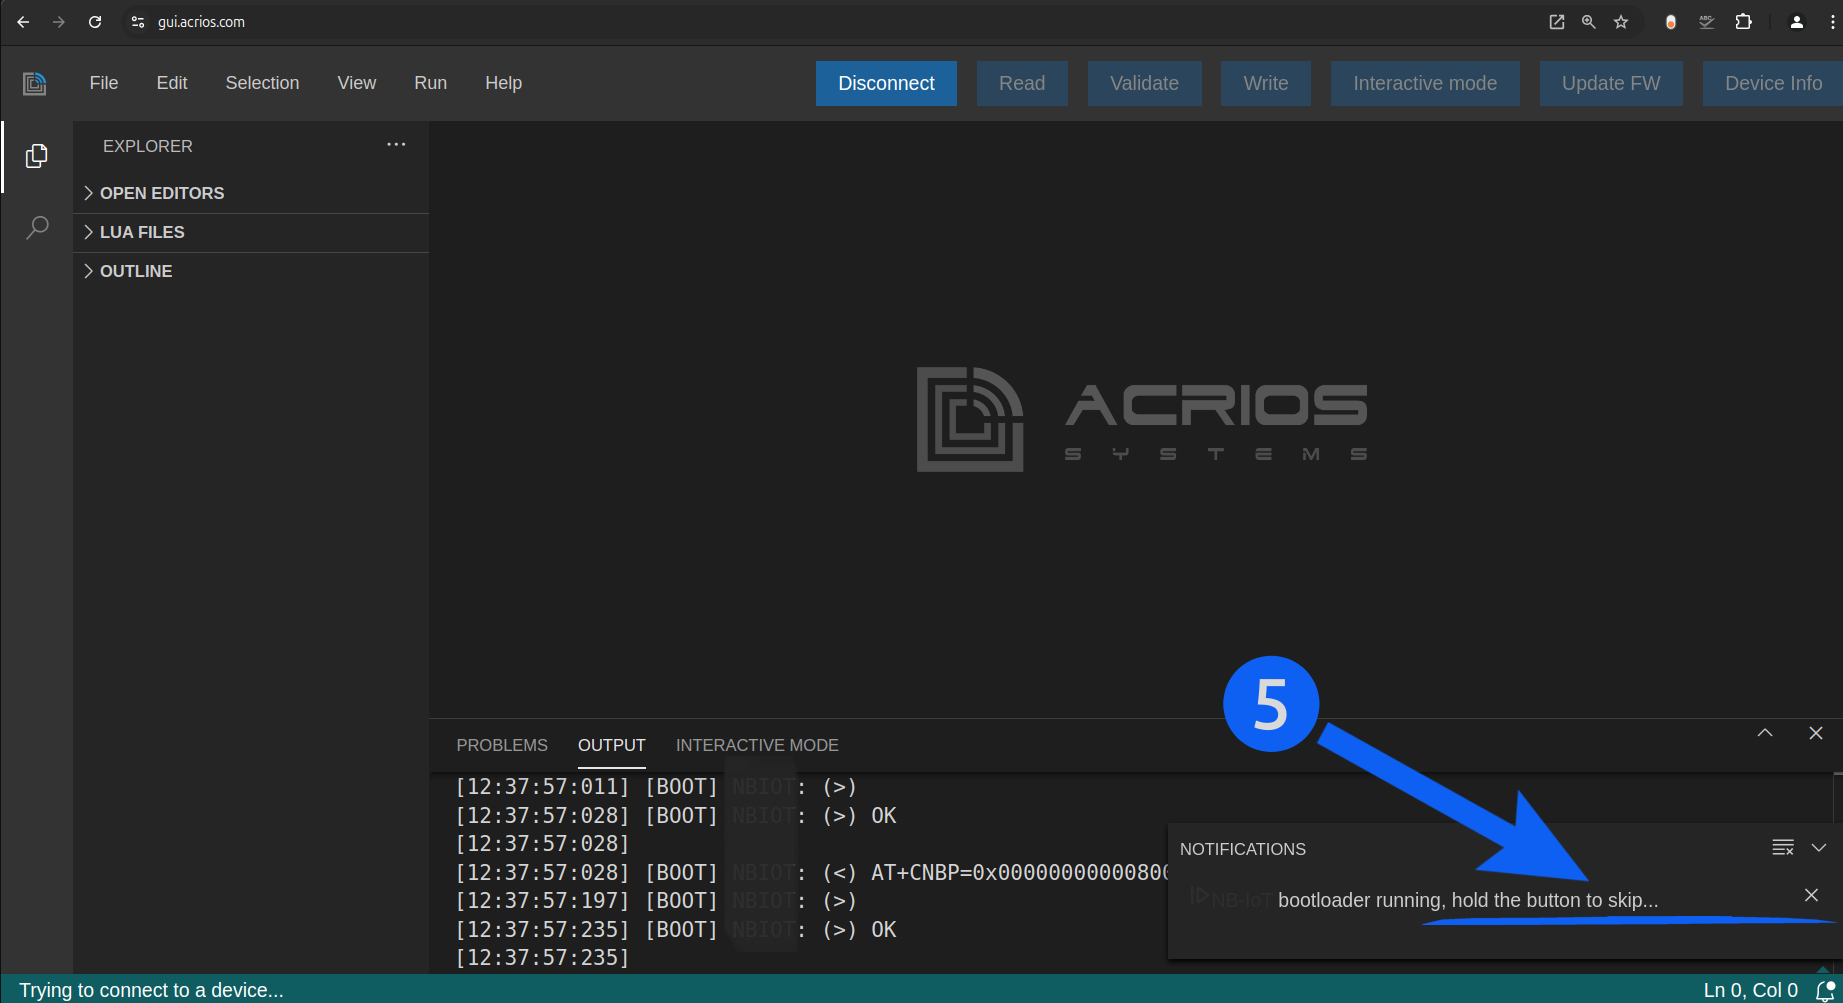
5. Bootloader will initiate (a blue LED will turn on), skip it by holding the button and letting go after a while. It should blink couple times once you let go - bootloader has been skipped.

6. Once the bootloader is skipped, the device should be connected. Configure it according to your needs. You can find more here.
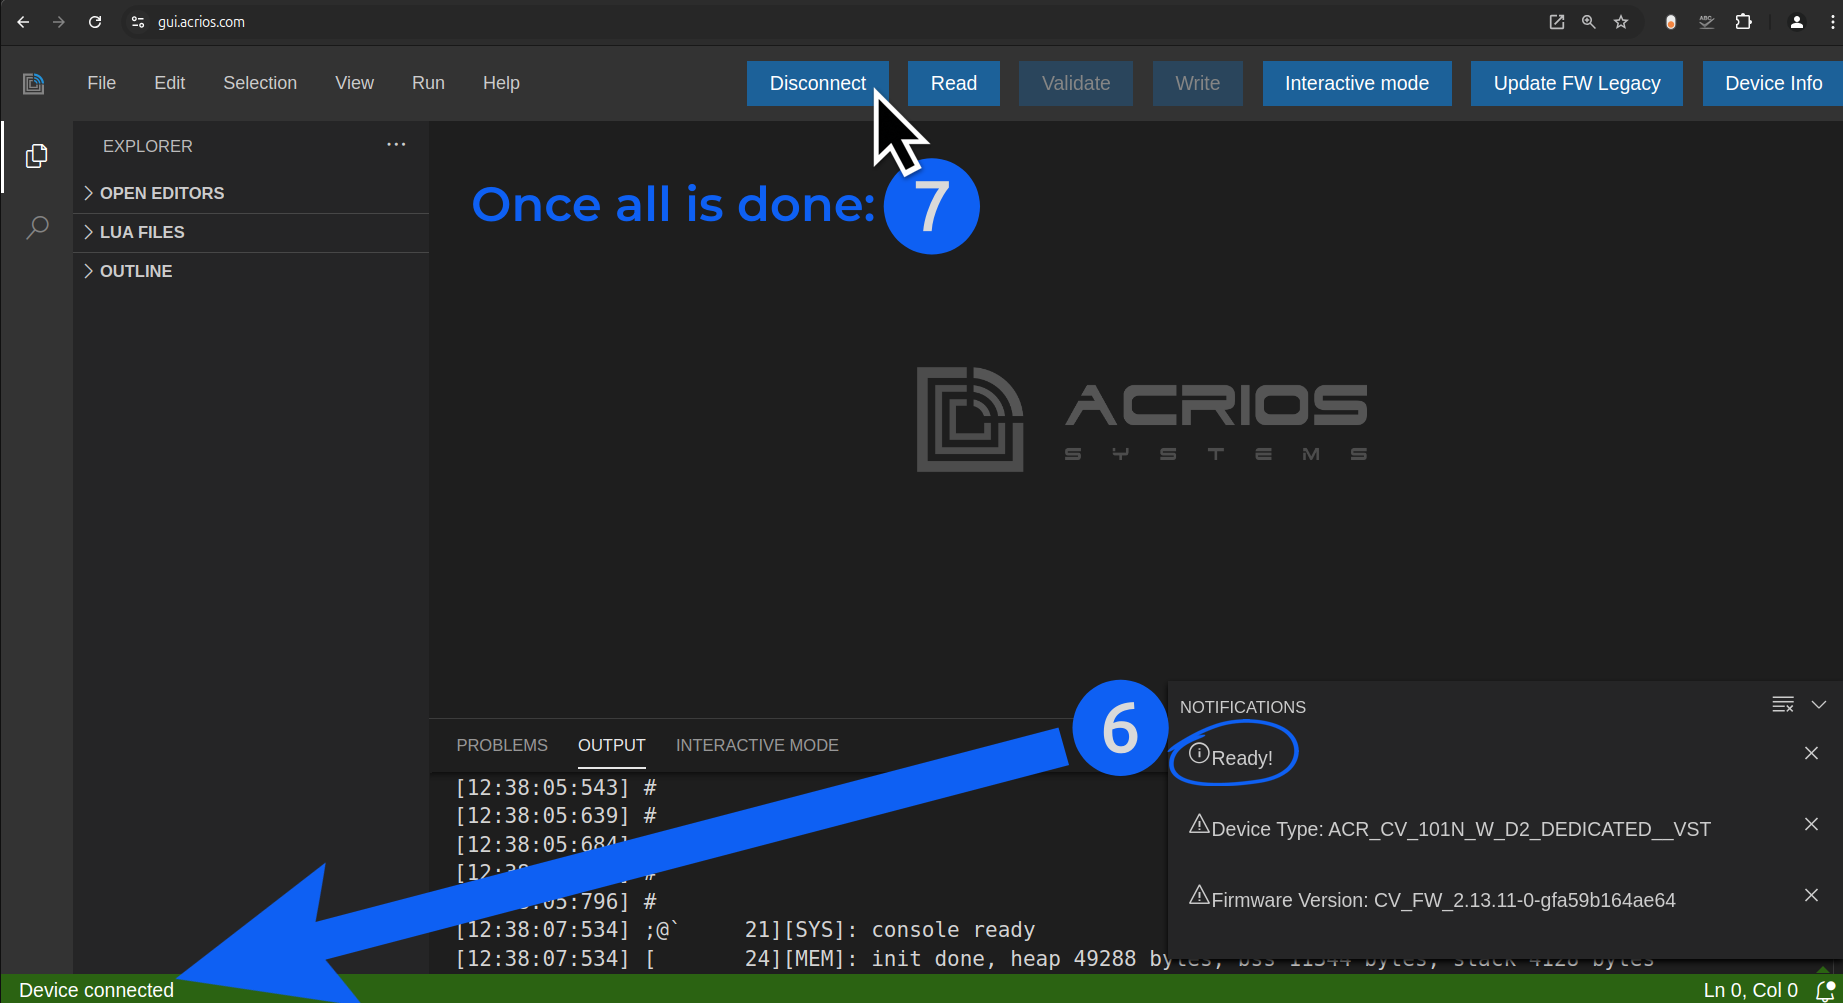
7. Press "Disconnect", disconnect the power source and connect it again.
Remote Configuration
Refer to the other sections such as Manuals, Tools or Configuration API for further details on remote configuration.